Set up Internet-ID Routing
Overview
Use RU Server as the routing server for Internet-ID connections. This can bring the following benefits.
- Speed and performance can improve significantly as compared with our public servers because you bring the routing server much closer geographically to Viewer (or Host) location.
- Using your own routing server makes you independent from our company servers and gives you control over your entire remote support infrastructure.
Configure RU Server
Install RU Server, and make sure it is directly accessible from Viewer and Host.
Configure Host
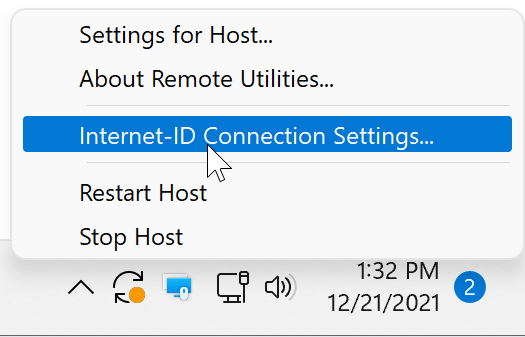
- Right-click the Host icon and select Internet-ID Connection Settings.
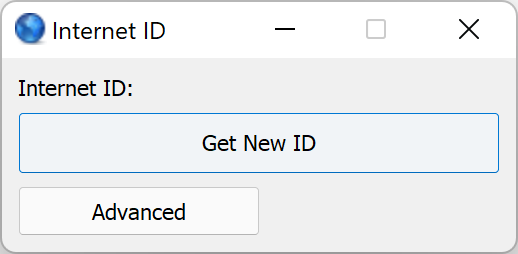
- Click Get New ID to create a new Internet-ID. Skip this step if an Internet-ID code has already been created.
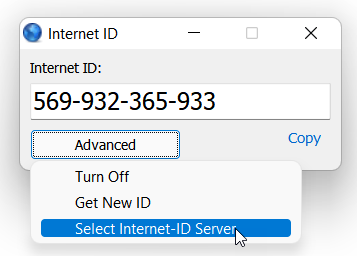
- Click Advanced→Select Internet-ID Server.
- Deselect Use default server and enter the DNS name (or the IP address) of your RU Server. Click OK and close the Internet-ID settings.

Configure Viewer
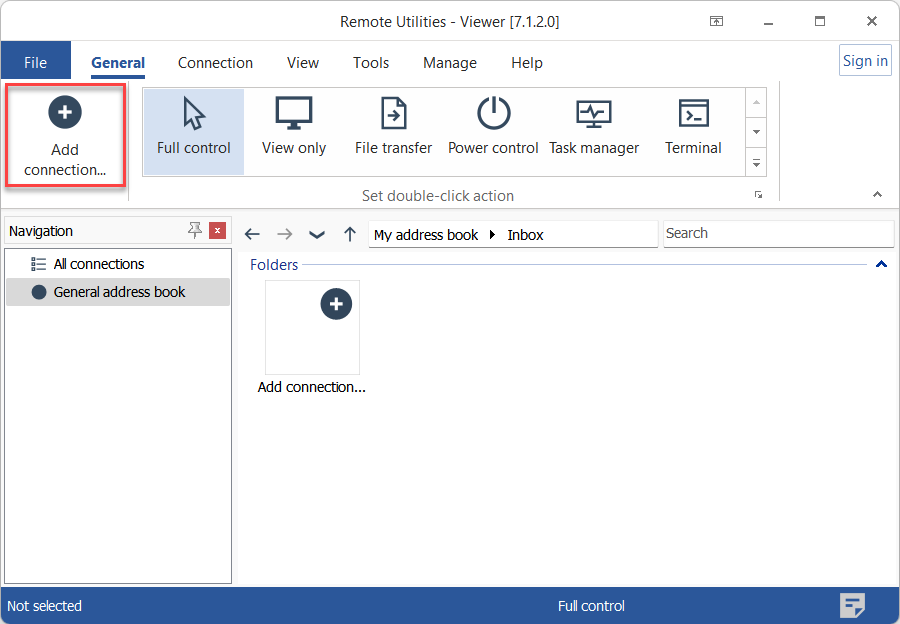
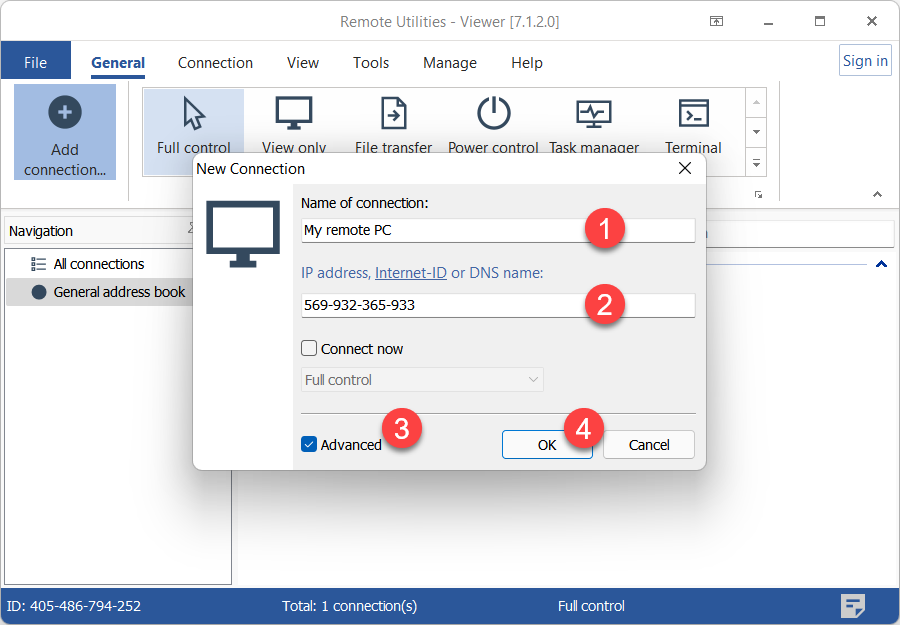
- Open Viewer and click Add connection.
- Enter a descriptive connection name and the Internet-ID code. Select Advanced and click OK.
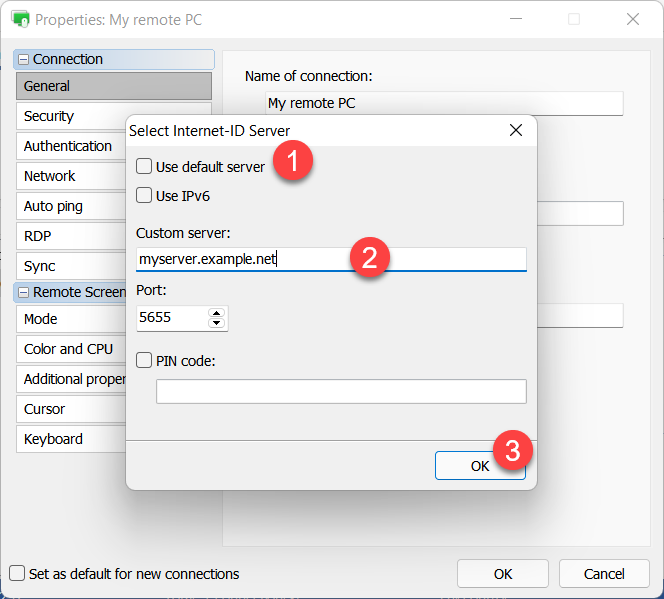
- Click Change.

- Deselect Use default server and enter the DNS name (or the IP address) of your RU Server. Click OK and close connection properties.
- A new connection will appear your address book.
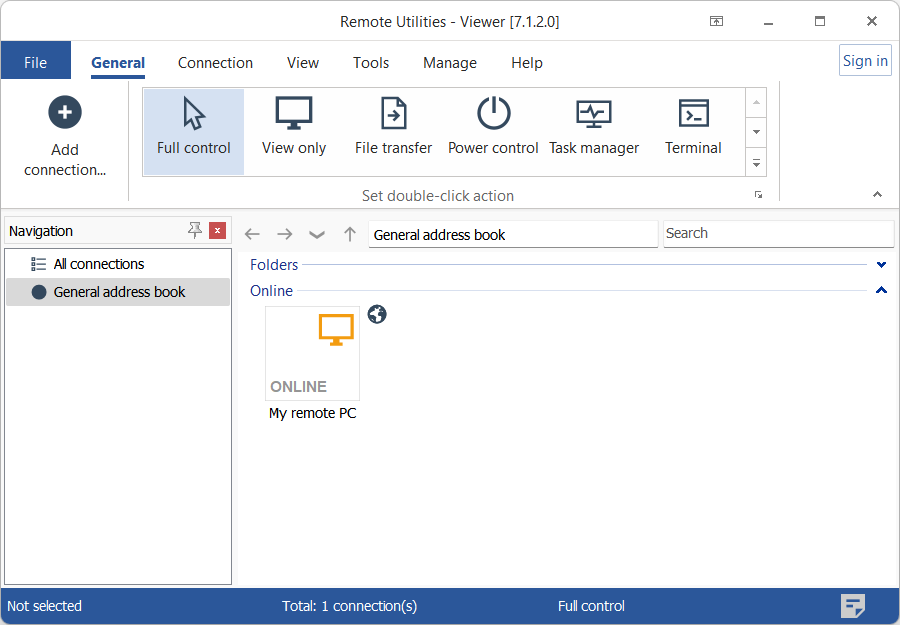
The setup is complete. You can now start a remote session by double-clicking on the connection in your address book. Viewer and Host will use your RU Server as the routing server for this connection.
Turn on permission-based Internet-ID access
You can turn on permission-based access to the RU Server Internet-ID routing. Only the accounts that you explicitly give permission to use the Internet-ID routing will be able to connect via this server.
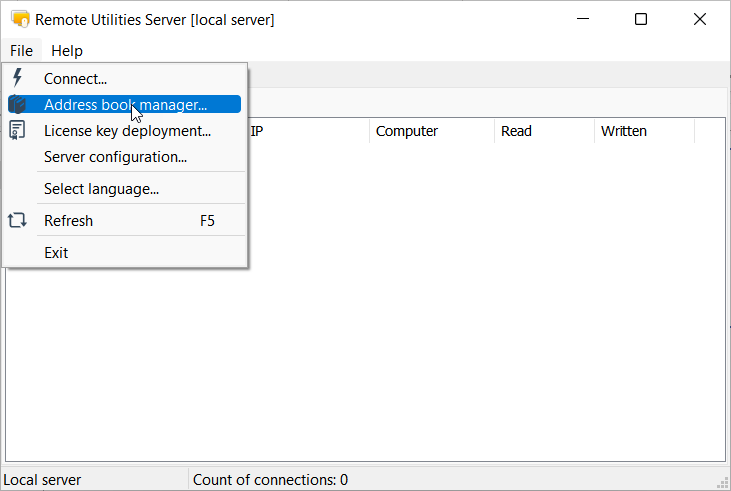
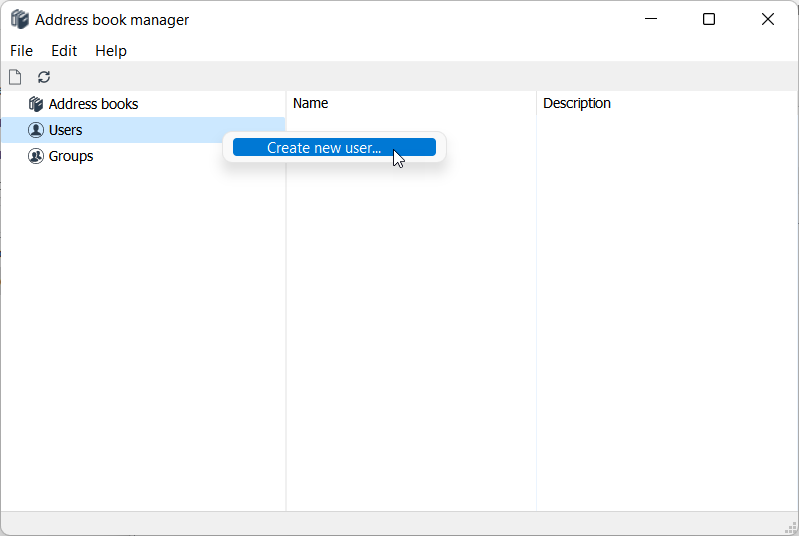
- Open Admin Console and go to File→Address book manager.
- Right-click Users and select Create new user.
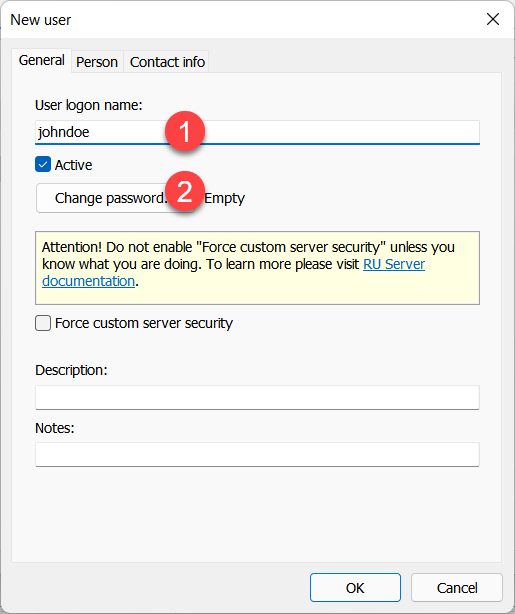
- Enter username and click Change password.
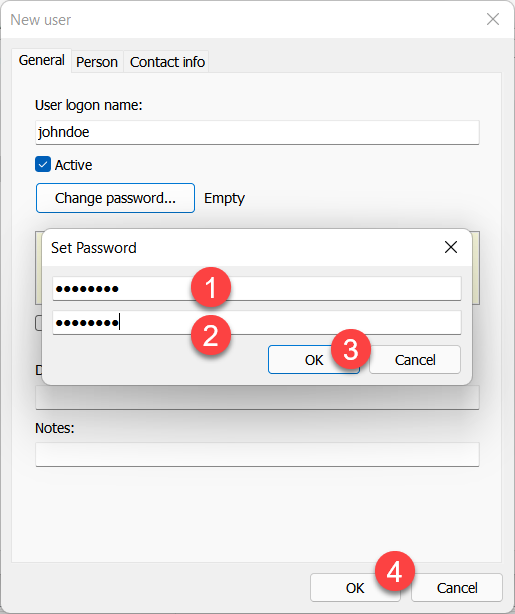
- Set and confirm a new password, click OK, OK.
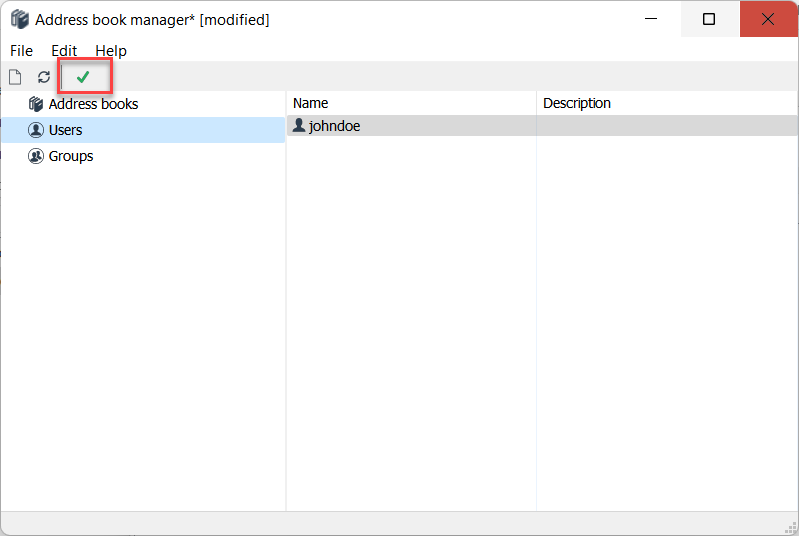
- Click the green checkmark to apply the changes and close Address Book Manager.
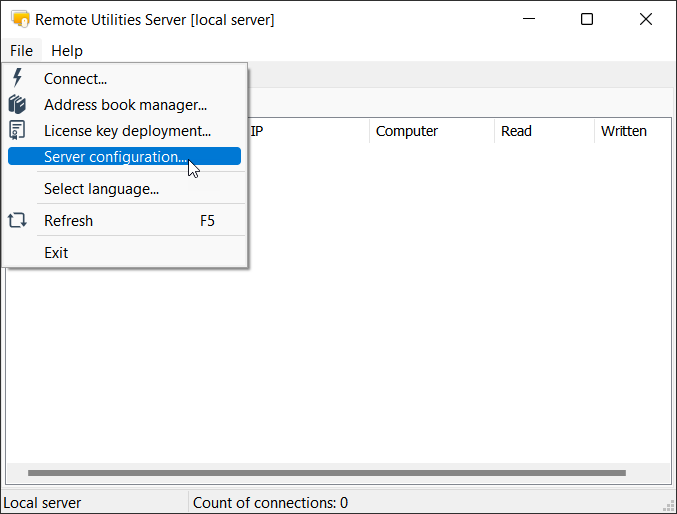
- In Admin Console go to File➝Server configuration:
Alternatively, go to Windows Start menu➝All apps➝Remote Utilities Server➝Configuration.
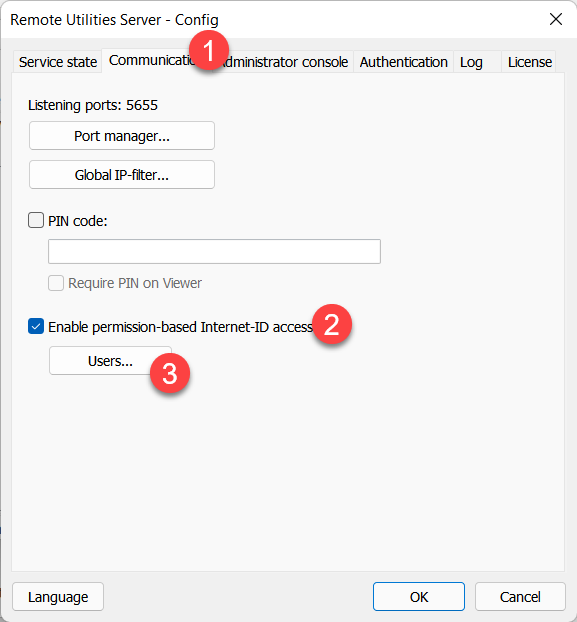
- Go to the Communication tab, turn on Enable permission-based Internet-ID access and click Users.
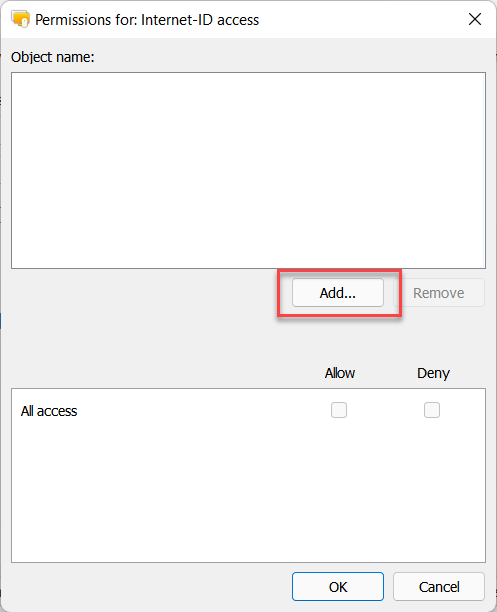
- Click Add.
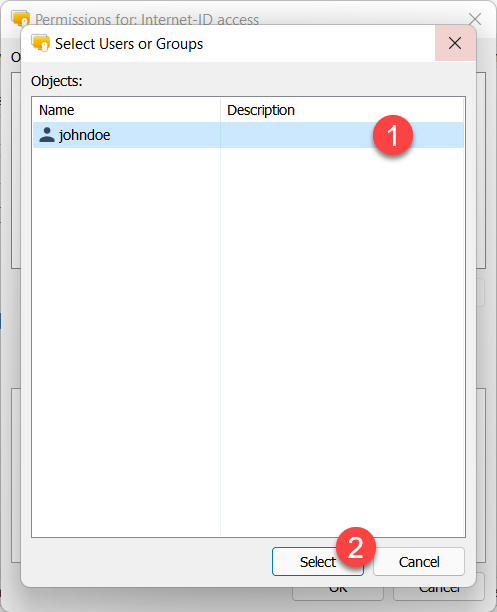
- Select a user (or a group) whom you want to grant permission to connect using Internet-ID and click Select.
- Make sure All access is set and click OK. Close the sever configuration window.
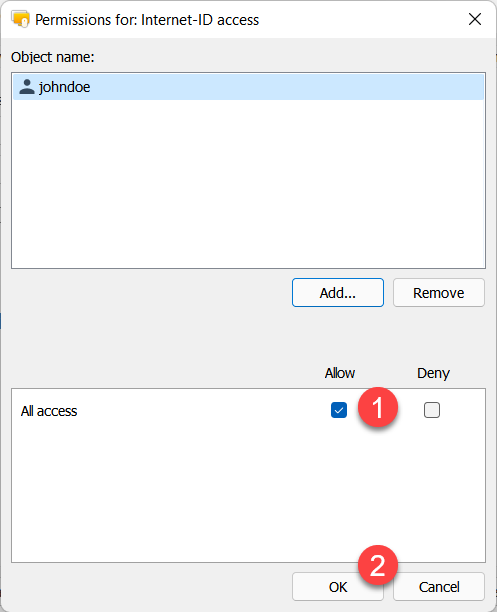
Now the user with the account name 'johndoe' will be able to use RU Server for Internet-ID connection provided that they sign in on RU Server first.
Turn on PIN code protection
Setting a PIN code can help prevent accidental or deliberate use of your RU Server Internet-ID routing by unauthorized Hosts and (optionally) Viewers.
Set up PIN on RU Server
- In Admin Console go to File➝Server configuration:
Alternatively, go to Windows Start menu➝All apps➝Remote Utilities Server➝Configuration.
- Go to Communication, turn on PIN code and create a PIN code. This can be any alphanumeric sequence.
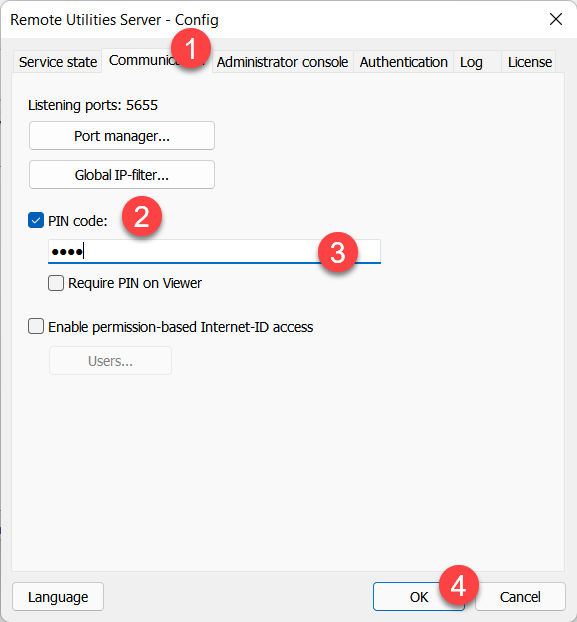
- Click OK to close the server configuration window.
Enter PIN on Host
If you set a PIN code on RU Server, you should enter the correct PIN code in Host settings. Without the PIN code Host will not be able to connect to the server and use Internet-ID routing.
- Right-click the Host icon and select Internet-ID Connection Settings.
- Click Advanced→Select Internet-ID Server.
- Turn on PIN code, enter the same PIN that you set on RU Server and click OK.
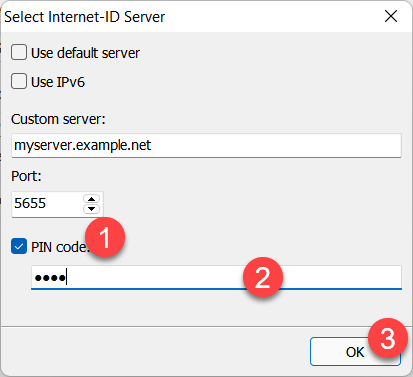
- Click OK to close the Internet-ID settings.
Enter PIN on Viewer
You can turn on the Require PIN on Viewer option in RU Server configuration—see "Set up PIN code on RU Server" above. With this option turned on Viewers will be required to have the correct PIN saved in the connection properties before they can connect via this RU Server.
- Right-click on the target connection in the address book and choose Properties.

- In the General tab click Change.

- Turn on PIN code, enter the same PIN that you set on RU Server and click OK.
- Click OK and close the properties window. You are now ready to connect to your remote Host.
If you use PIN code for Viewer, it must be set for each connection that uses your RU Server as the routing server. To edit multiple connections select them with your mouse cursor, right-click the selection and choose Properties. You can also make use of the default connection properties.