Admin Console
Admin Console is a GUI dashboard that lets you administer your RU Server, manage users and groups, and monitor the activity of Viewers and Hosts connected via the server.

To open Admin Console, click its icon (  ) in the system tray. Alternatively, go to Windows Start➝Remote Utilities Server➝Administration.
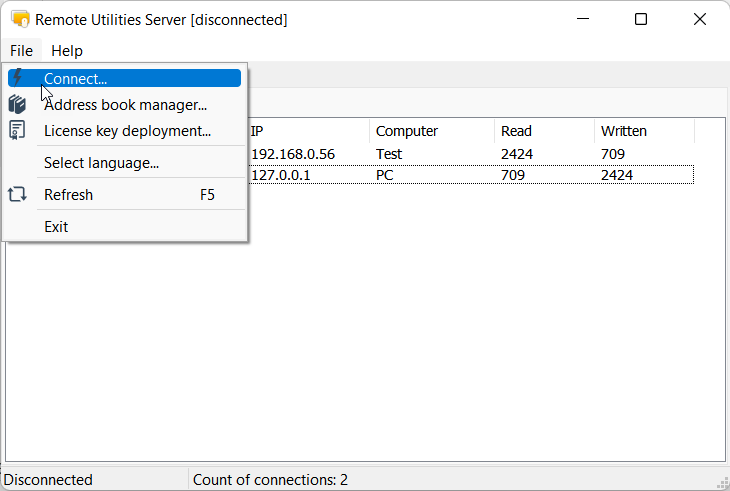
File menu
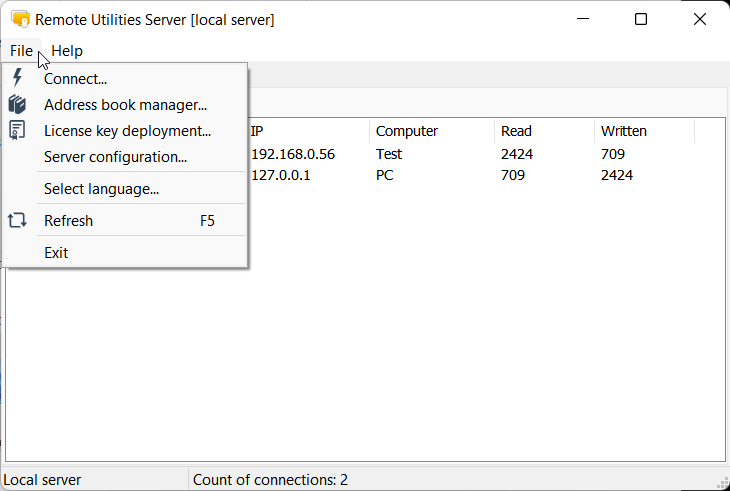
- Connect—open a connection dialog. This dialog lets you connect from Admin Console to the service. See the section "Connect to the service" below.
- Address book manager—open Address book manager.
- License key deployment—open License manager.
- Server configuration—open RU Server settings.
- Select language—select the interface language.
- Refresh—refresh the Active/Idle list.
- Exit—Admin Console will close. Note, that the RU Server service will still be running.
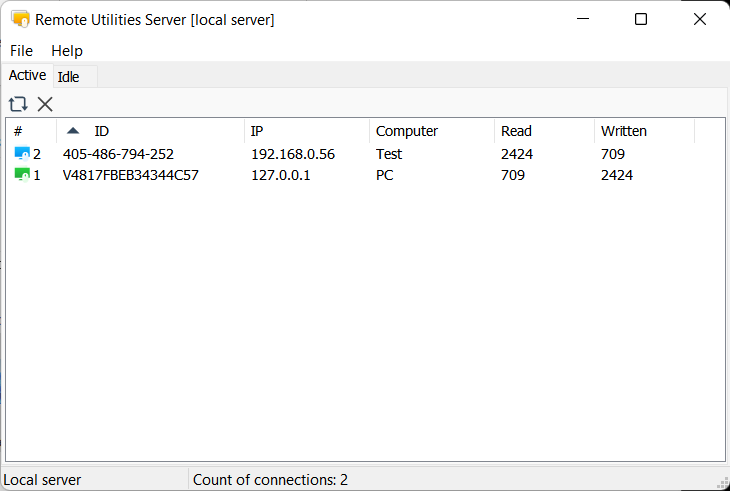
Active tab
The Active tab shows Viewers and Hosts that are currently using this server for a remote session.
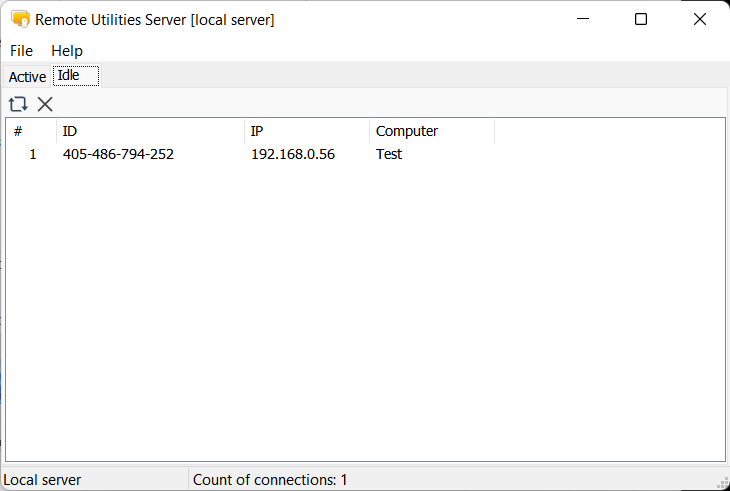
Idle tab
The Idle tab only shows listening Hosts with which no active remote session is being established.
Connect to the service
RU Server uses a "client-server" architecture meaning that there are two parts to the program: Admin Console (client) and the service (server, the core of the program). Admin Console connects to the service and is used as a dashboard to manage the service.
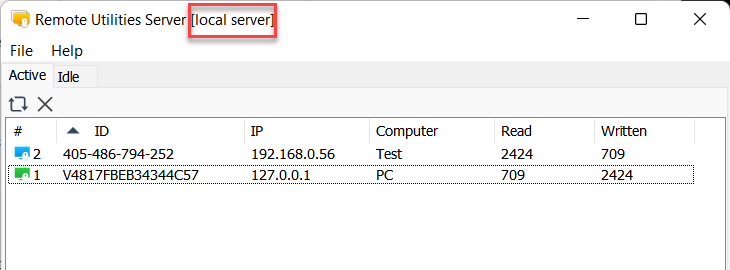
Localhost connection
By default, Admin Console and the service are both installed on the same computer and Admin Console automatically connects to the service at 127.0.0.1 (localhost). When connection is established the title bar shows "local server":
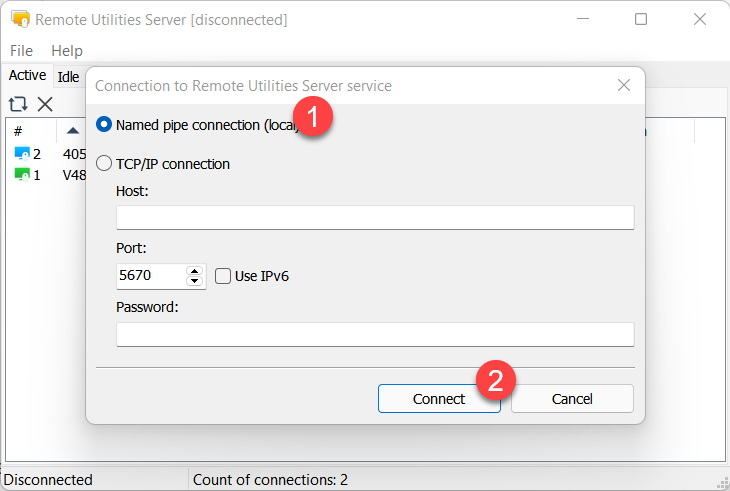
To re-connect Admin Console to the service if disconnected:
- Go to File➝Connect.
- Select Named pipe connection (local) and click Connect.
Remote connection
Let's assume you want to connect from Admin Console on computer A to the RU Server service running on computer B.
On Computer B
- Install RU Server.
- Go to Windows Start menu➝All apps➝Remote Utilities Server➝Configuration.

- Switch to the Administrator console tab and turn on Allow TCP/IP connection. Create the access password and click OK.
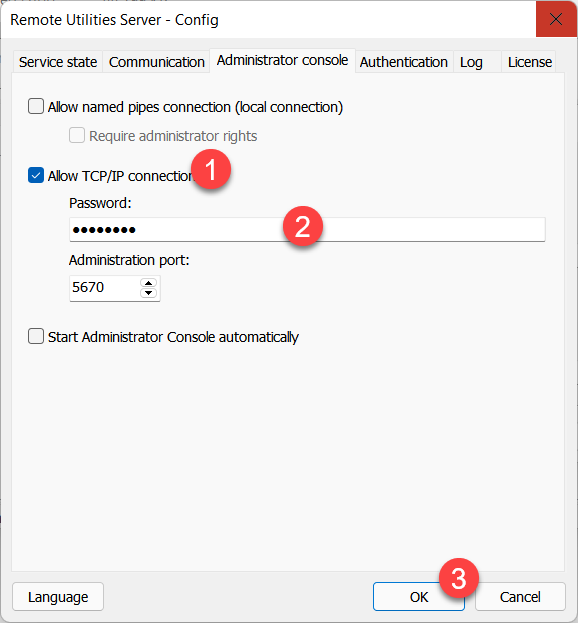
- Make sure the computer B is directly accessible and the service can be reached at port 5670 from the outside. See Make RU Server accessible for general guidance.
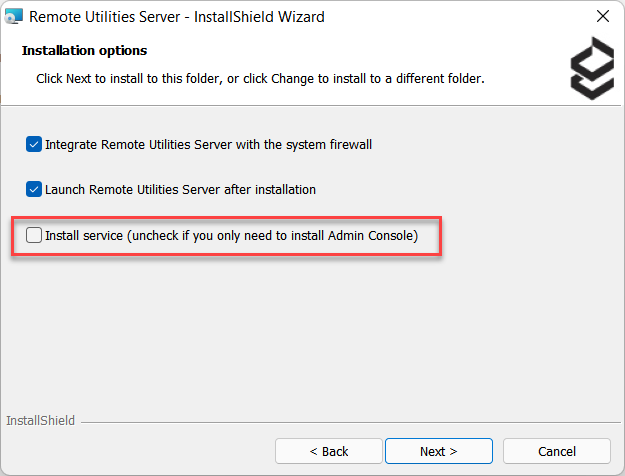
On Computer A
- Install RU Server. You can choose to only install Admin Console:
- Go to Windows Start➝Remote Utilities Server➝Administration to run Admin Console.
- Go to File➝Connect.
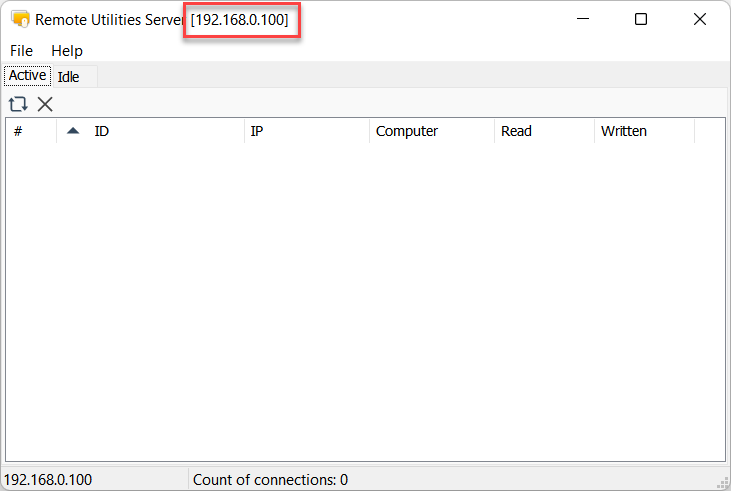
- In the connection dialog, enable TCP/IP Connection, enter the IP address or DNS name of computer B and the access password that you set in the service configuration window. Click Connect:

- If connection is successful the Admin Console title bar will show the IP address/DNS name of your server computer:
Important
If you cannot connect to the service, make sure that the service is installed and running. Try re-installing RU Server from scratch if unsure.