Callback Connection
The Callback feature enables direct connection to a remote Host even when the Host is not accessible by its IP address. Instead, the Viewer's external IP address is utilized to establish the connection link.
Use Cases
Typically, the callback connection type is employed when:
- You require a direct connection between the Viewer and Host, where the Host is NOT accessible by an IP address but your Viewer workstation DOES HAVE an external IP address.
- You prefer not to use the firewall bypassing capabilities (Internet ID) integrated into Remote Utilities for straightforward connection setup.
Set Up Callback on the Host
The primary concept of the callback connection type is that the Host "pings" the Viewer and offers remote access. To initiate a remote session, the Viewer only needs to accept this invitation.
Important!
Host requests can be sent manually or automatically at regular intervals.
To enable callback on the Host:
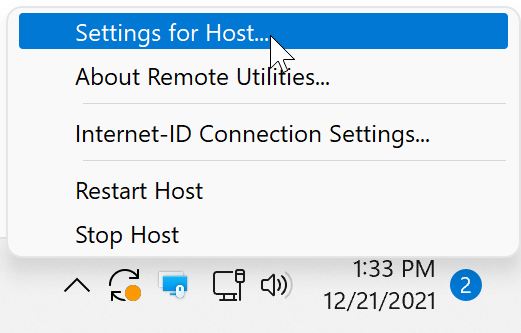
- Right-click the Host icon and select Settings for Host:
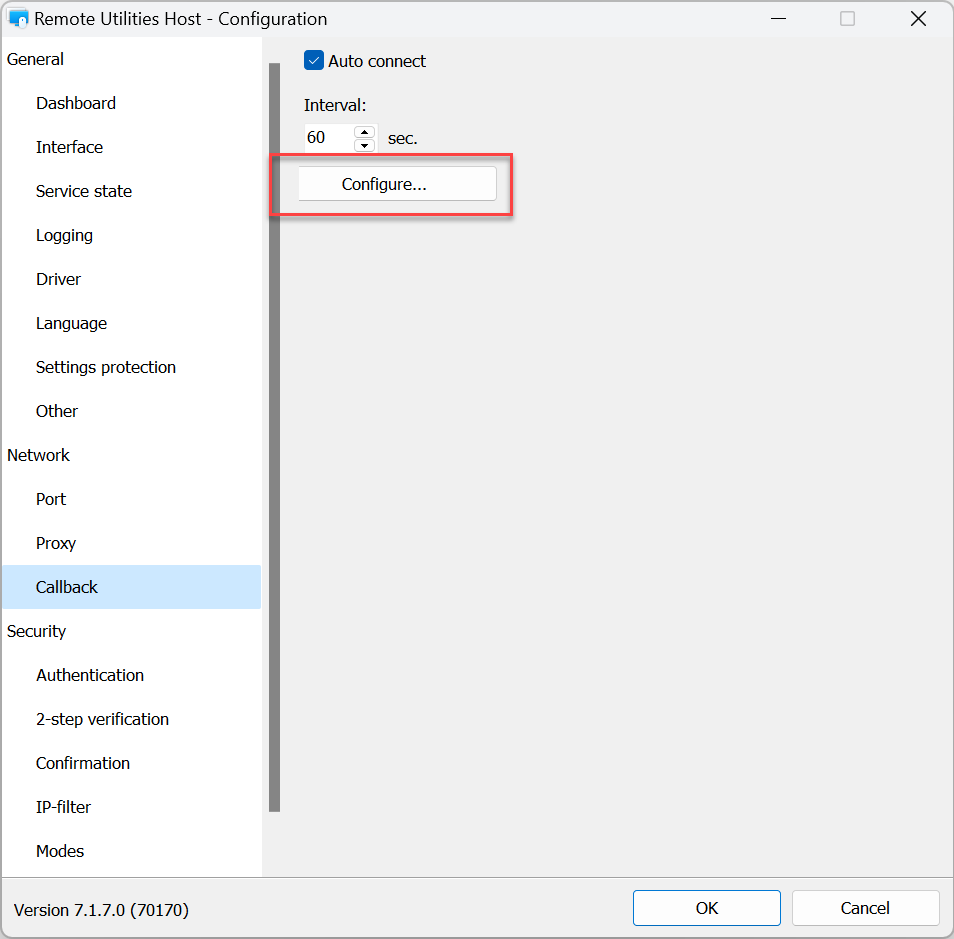
- Go to Network ➝ Callback and click Configure:
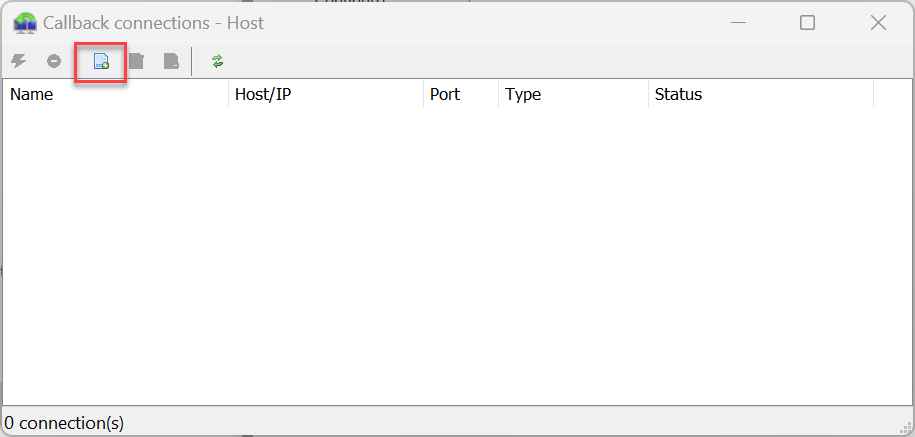
- The callback connection window will appear. Click the Add connection icon on the toolbar:
- The New connection dialog window will appear. Enter the Viewer's IP address or DNS name in the Host/PC field. Select or deselect other options as necessary and click OK:
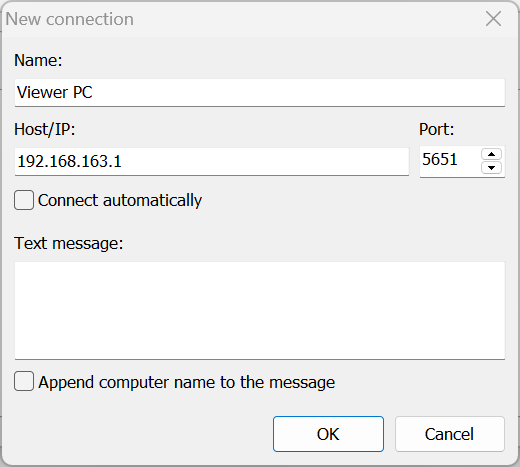
- Name — a descriptive name for the callback entry
- Host/IP — the IP address of the Viewer PC
- Port — the port set in the Viewer for callback connection (see "Viewer configuration" section below)
- Connect automatically — when selected, the Host will send connection requests automatically at the interval set in the Settings for Host ➝ Network ➝ Callback tab
- Text message — text message displayed on the Viewer PC screen when the callback request is received
- Append computer name to the message — also show the name of the computer from which the message was sent
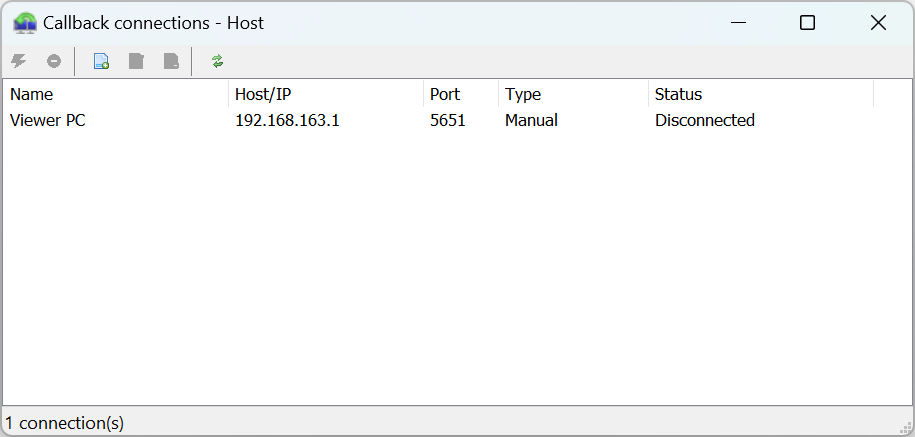
- The new connection will appear in the list of callback connections:
Set up Callback on the Viewer
To enable inbound connection requests, activate the callback feature on the Viewer:
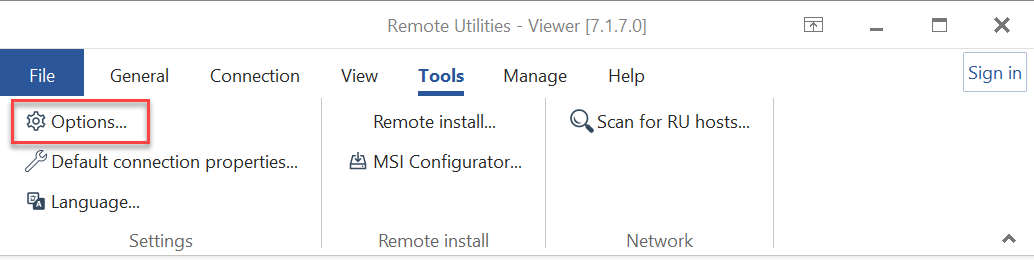
- Select the Tools tab in the Viewer, then click Options:
- In the Options window, go to the Callback tab and choose Allow callback:
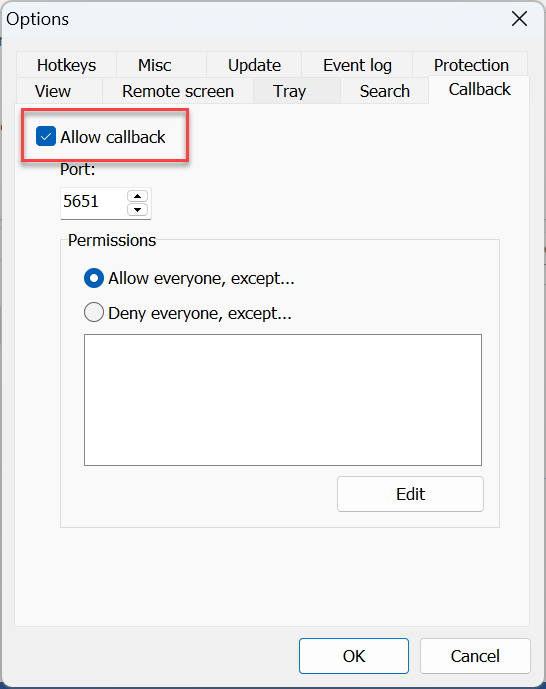
- (Optional) Click Edit to restrict incoming connection requests to specific IP addresses or IP address ranges.
- Click OK to close the Options window.
Important!
Ensure you use the same callback port on both the Viewer and Host sides. Additionally, the port must be permitted in the firewall on the Viewer PC.
Connect to a Remote PC Using Callback
If you enabled the Connect automatically checkbox when configuring callback on the Host side, the Host will periodically send connection requests to the Viewer.
Important!
The interval is set in the Settings for Host ➝ Callback tab.
Upon receiving an incoming connection request from the Host, a small icon (  ) appears in the system tray on the Viewer PC. Click this icon to open the window shown below, then click Accept:
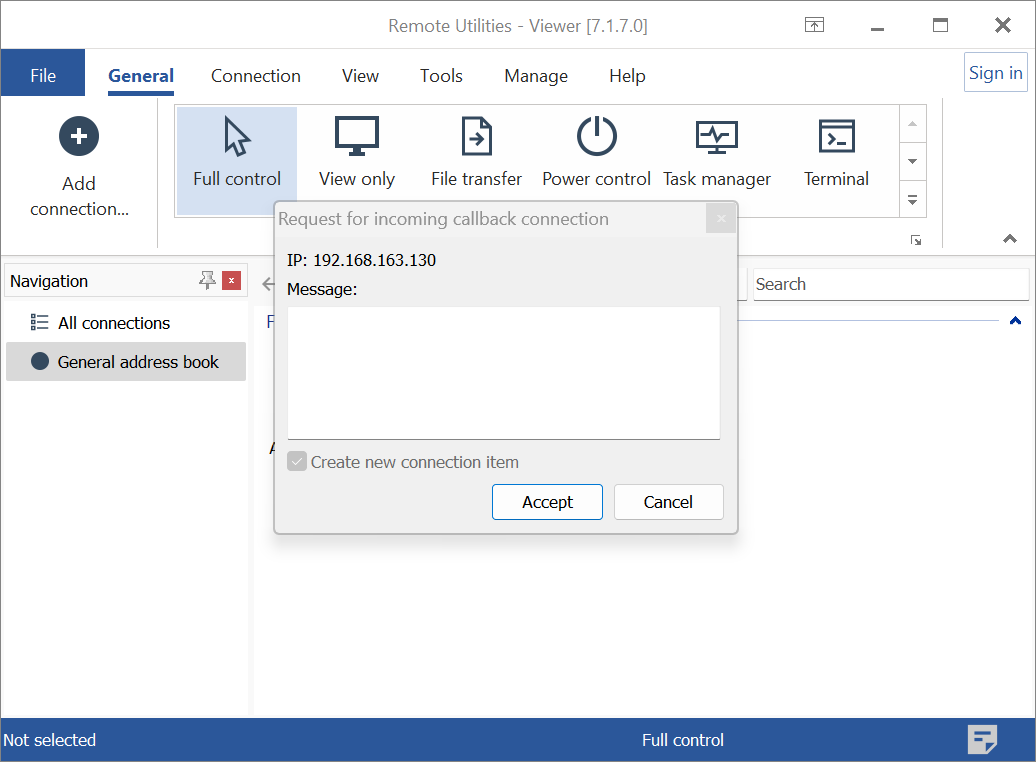
A New connection window will appear:
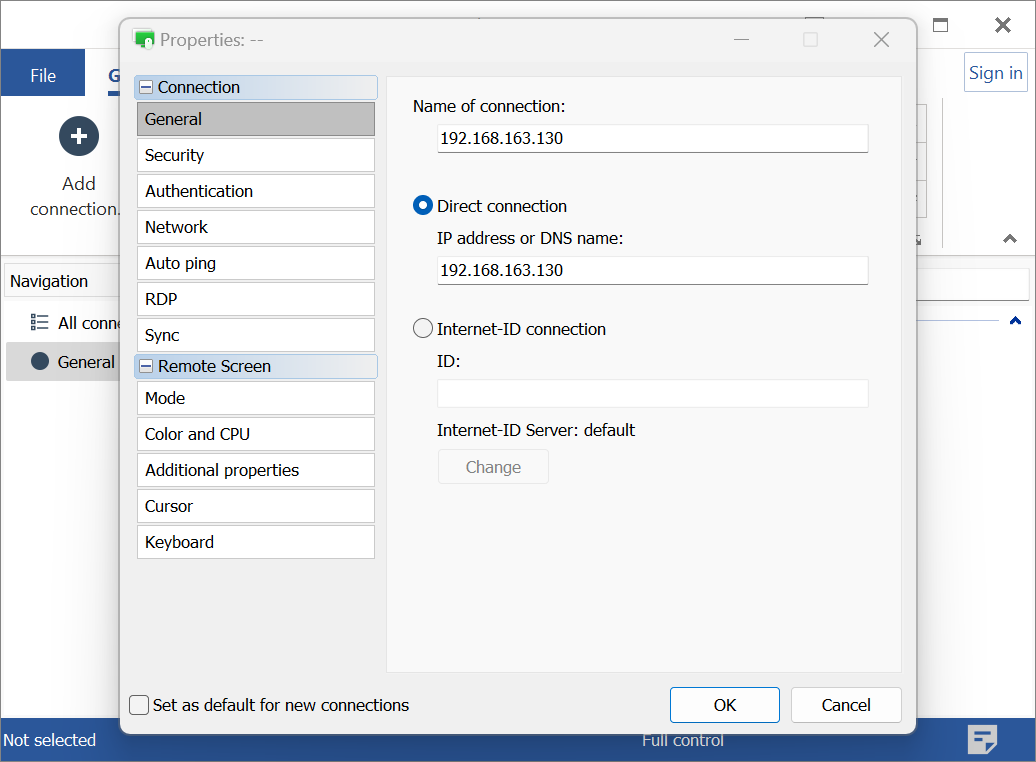
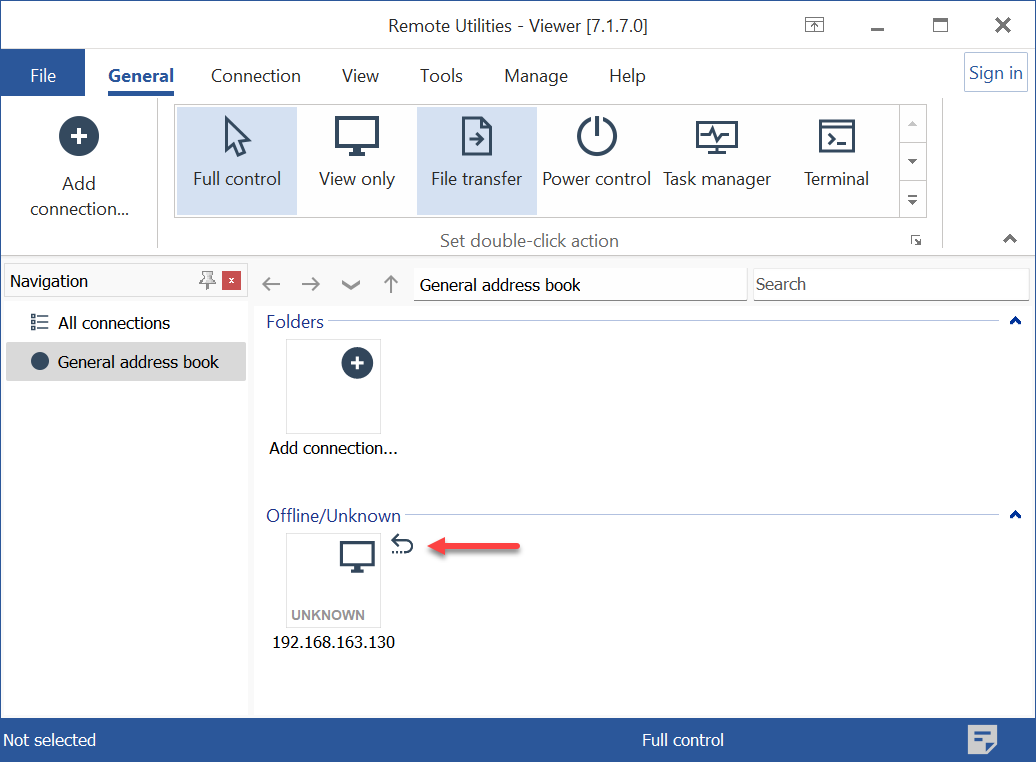
Enter a descriptive name for the connection and click OK. The connection is now ready for use. Observe the callback connection icon at the top right corner of the connection thumbnail in the address book, which helps distinguish this type of connection from regular ones:
Important!
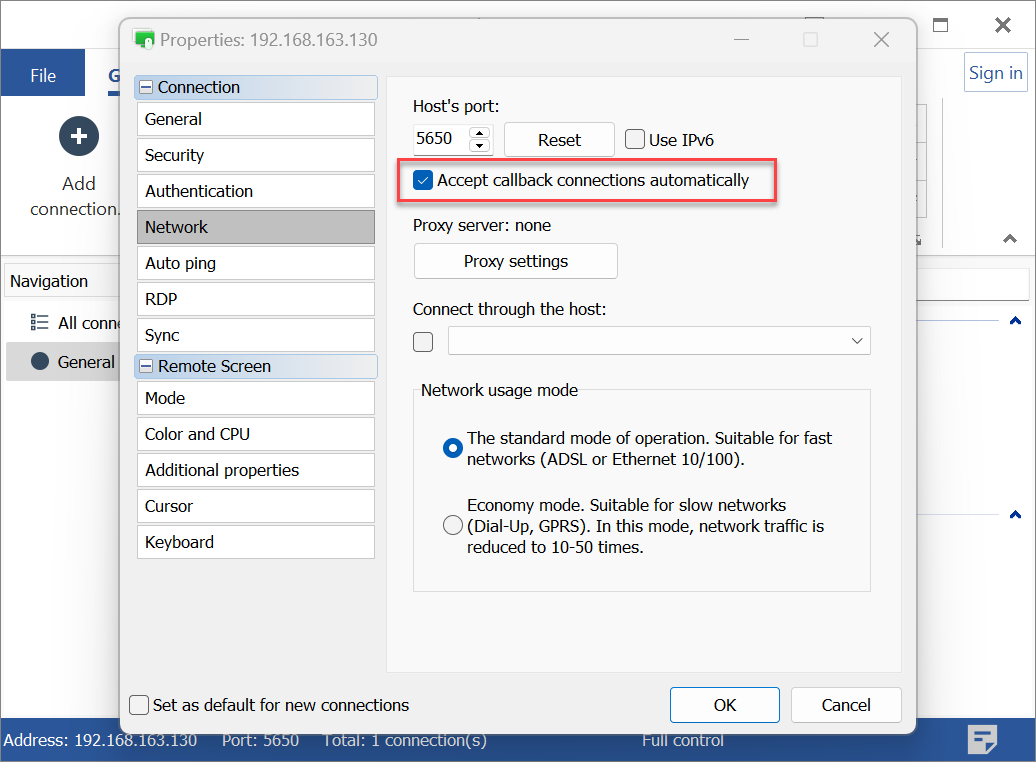
If you want to eliminate subsequent messages from the Host asking you to accept the connection, open connection properties, navigate to the Network tab, and select the Accept callback connections automatically checkbox. This will silently accept callback connections from that specific remote Host, so you won't have to accept them each time the server "calls back".