Security Settings
Authentication methods
In order to access a remote Host you must authenticate on that Host, i.e. provide your access credentials in a security prompt window when you start a remote session.
Remote Utilities offers four authentication methods:
- Single password security
- Remote Utilities security
- Windows security
- Custom server security
Multiple authentication methods can be enabled on the same Host.
Important!
For security reasons, there are no technical, blank or default passwords. If no authentication method is enabled on a Host, you will NOT be able to connect to the Host. Make sure that you turn on at least one authentication method.
Single password security
To turn on single password authentication:
- In the Settings for Host go to Authentication.
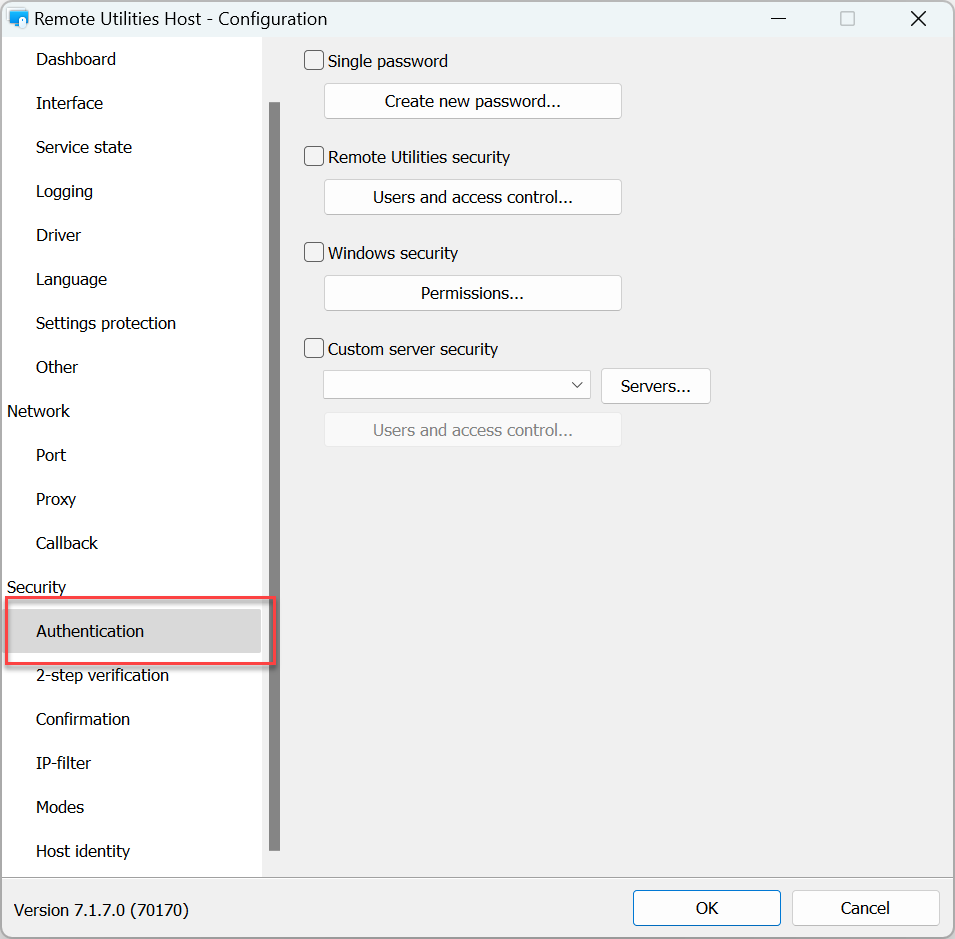
- Select the Single password checkbox.
- Enter and confirm a new password and click OK.
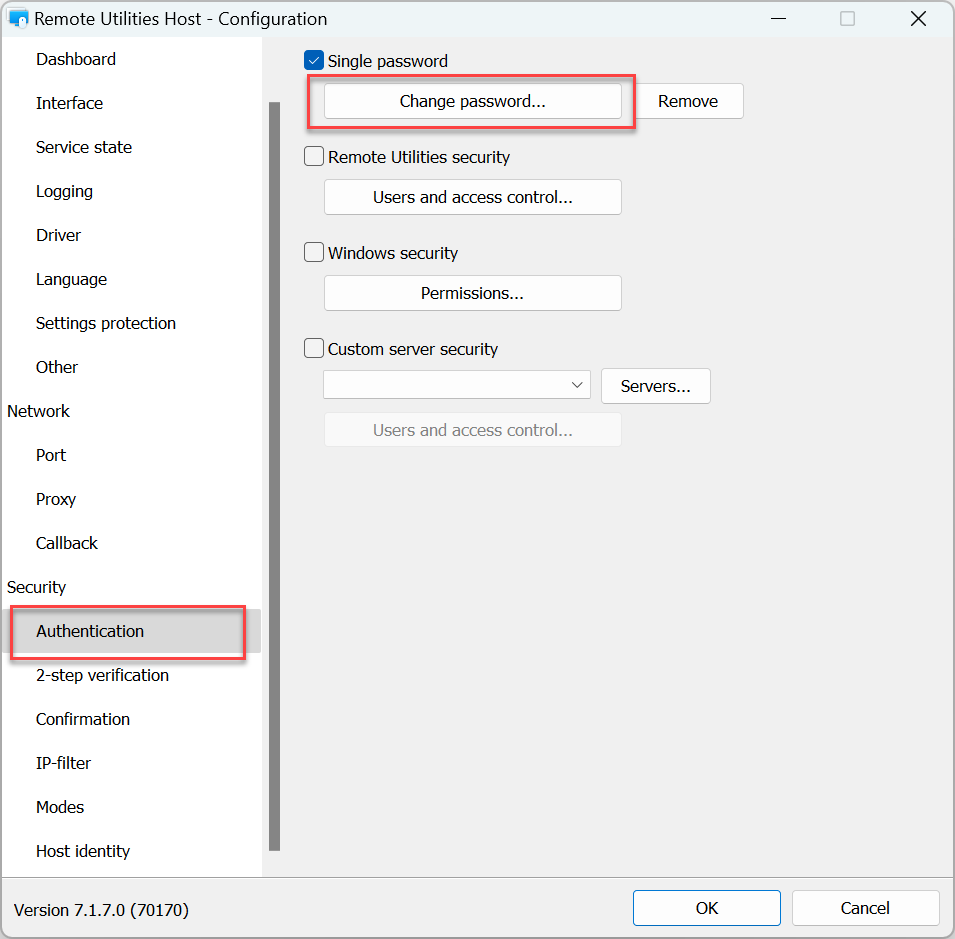
To change the existing password:
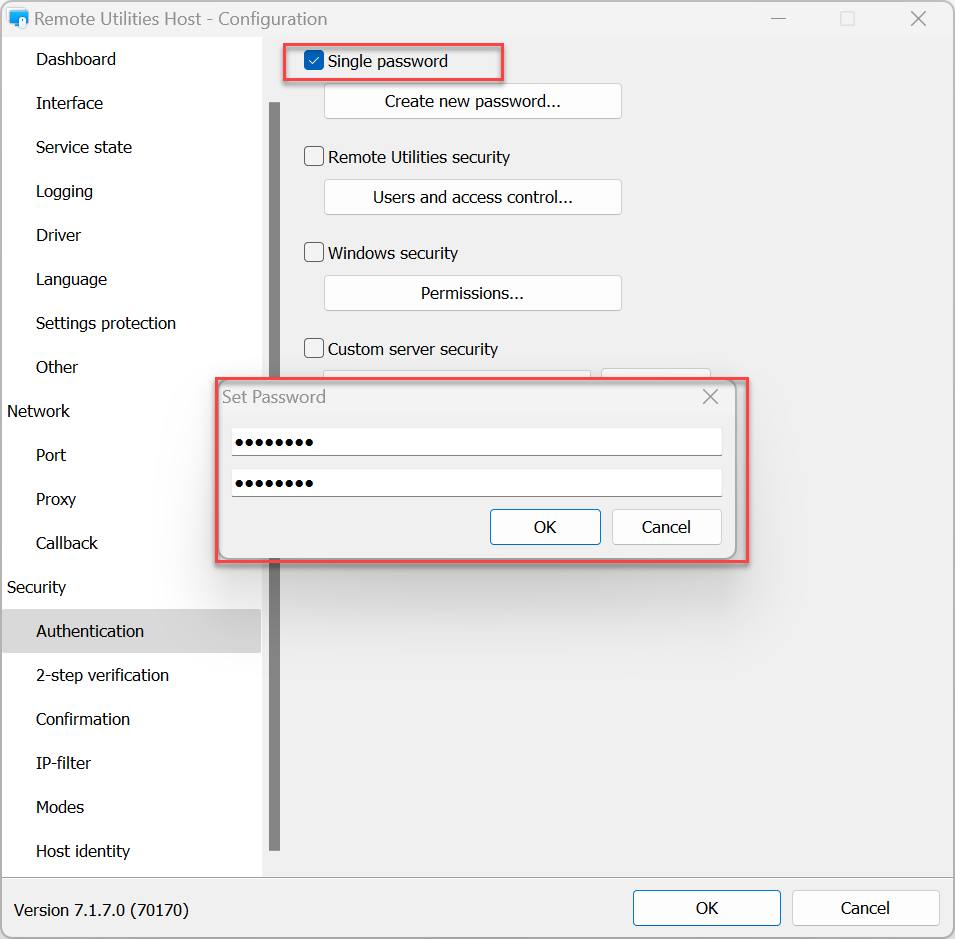
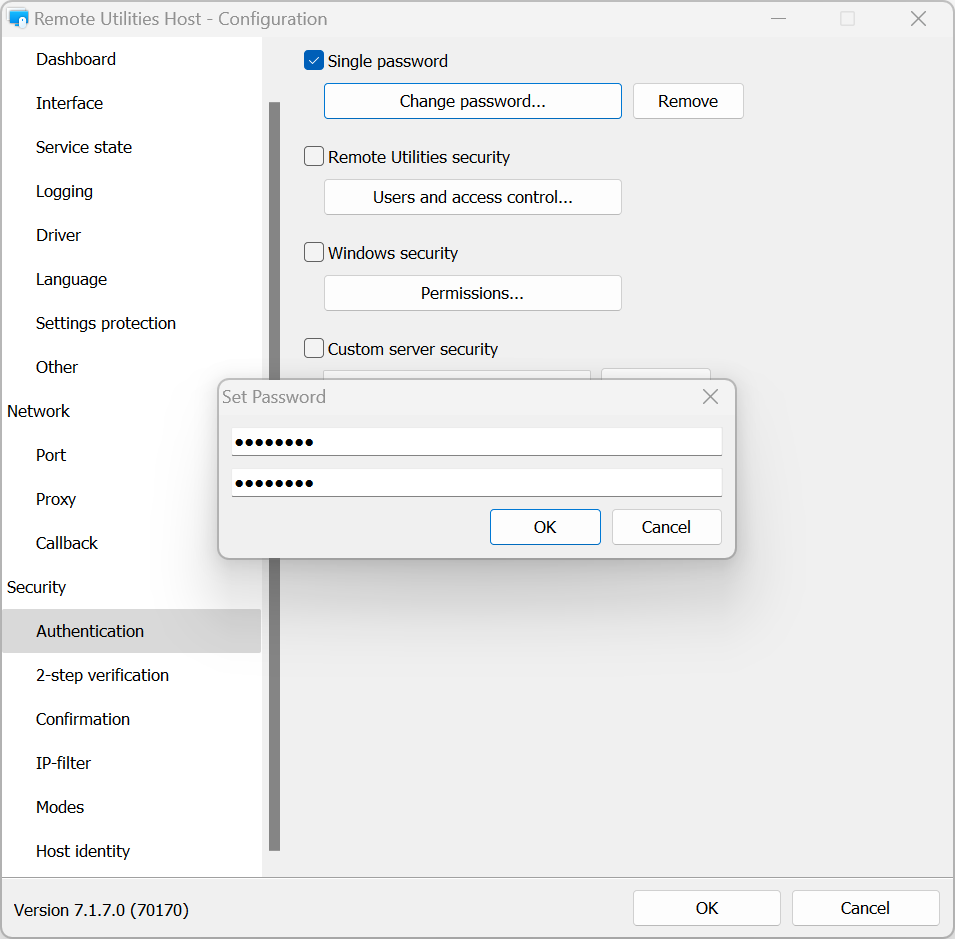
- In the Settings for Host go to Authentication and click Change password.
- Click Yes in the warning message:

- Enter and confirm a new password and click OK:
To turn off single password authentication:
- In the Settings for Host go to Authentication.
- Deselect the Single password option and click OK.
Remote Utilities security
Use this authentication method if you want to create multiple user accounts with different permissions for each account.
To turn on RU Security and set permissions:
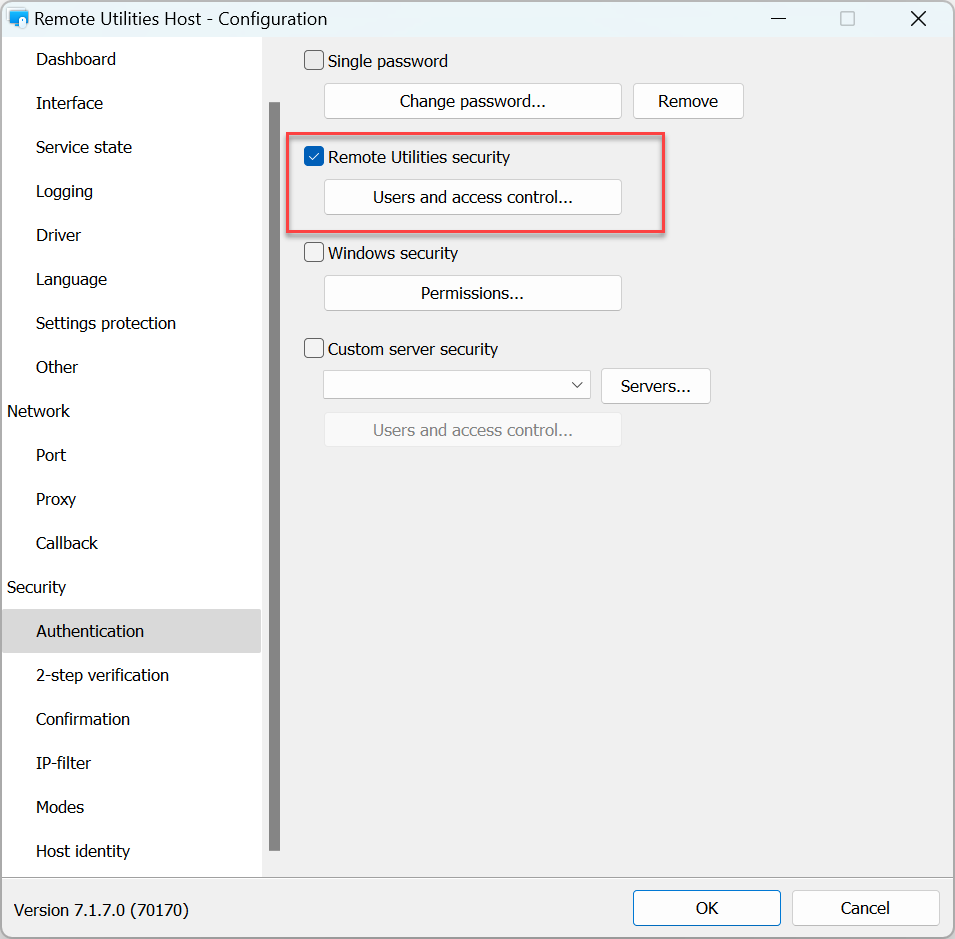
- In the Settings for Host go to Authentication.
- Select Remote Utilities Security and click Users and access control:
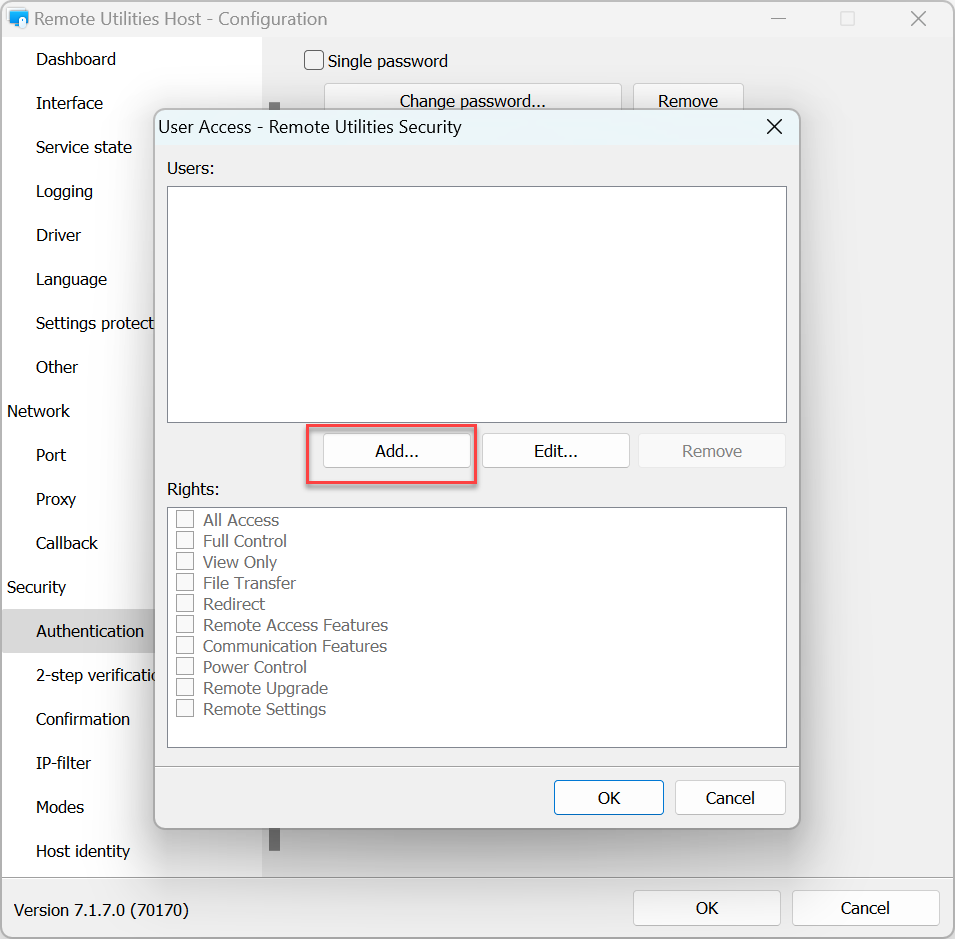
- Click Add:
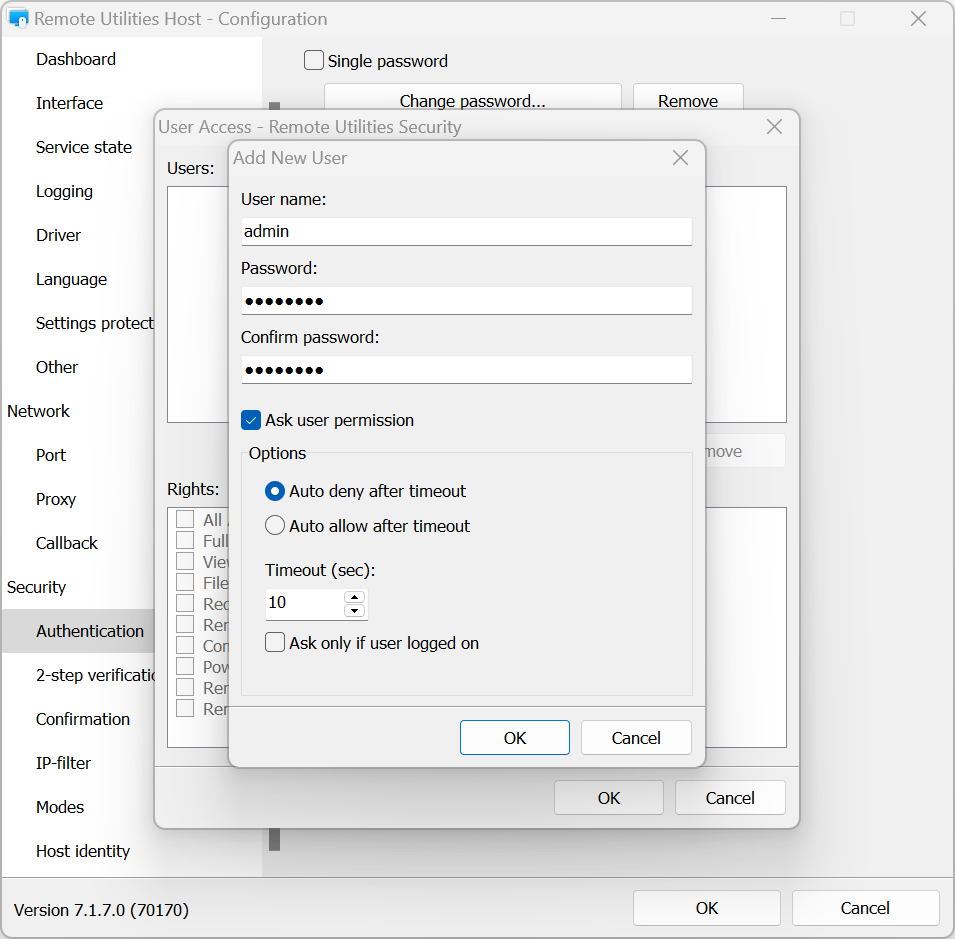
- Create a username and password. You can optionally enable Ask user permission option for this user. Click OK:
- In the Rights box set connection mode permissions for this user and click OK:
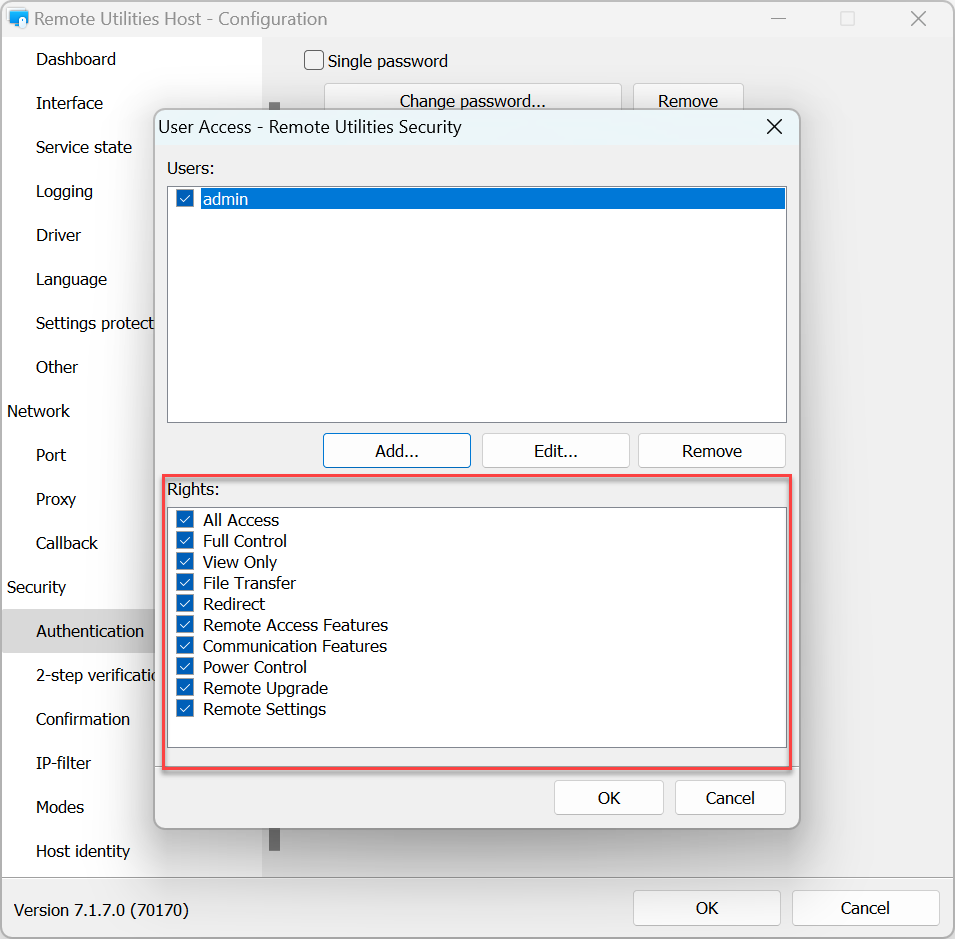
- To apply the settings click OK and close the Host settings window.
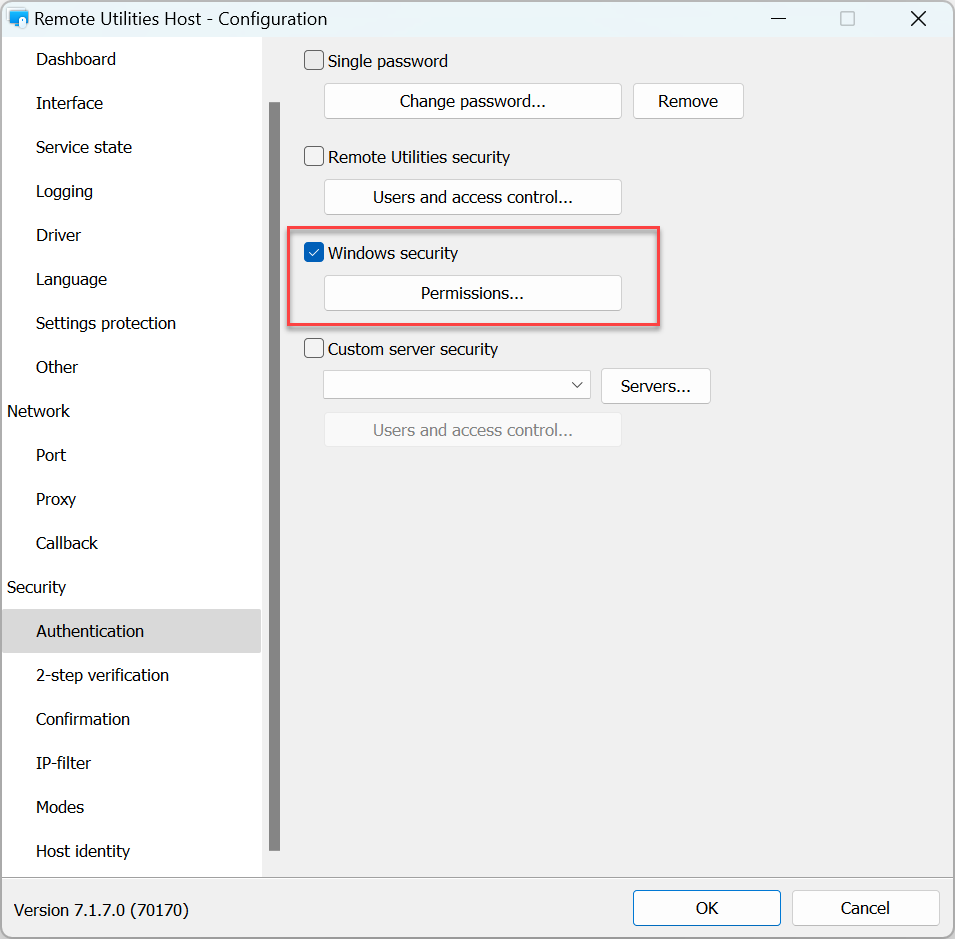
Windows security
With this authentication method you can use Windows accounts to authenticate on the remote Host.
To turn on Windows Security authentication and set permissions:
- In the Settings for Host go to Authentication.
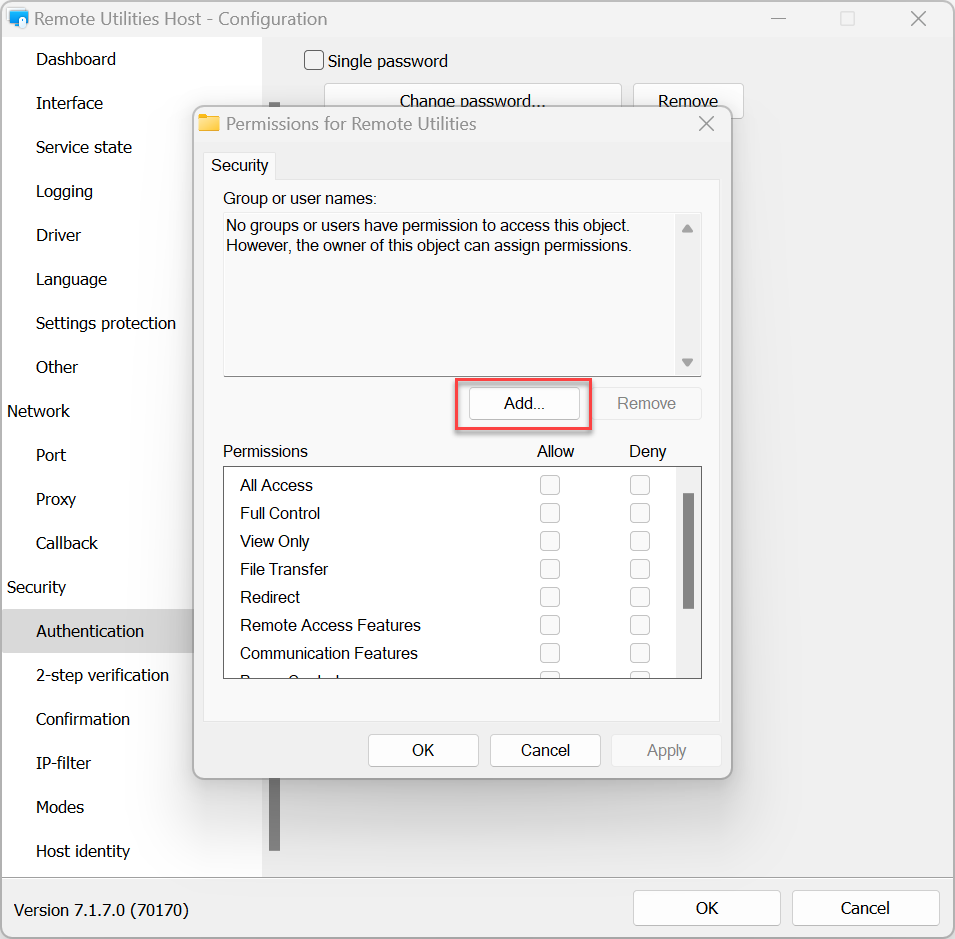
- Select Windows Security and click Permissions:
- Click Add..
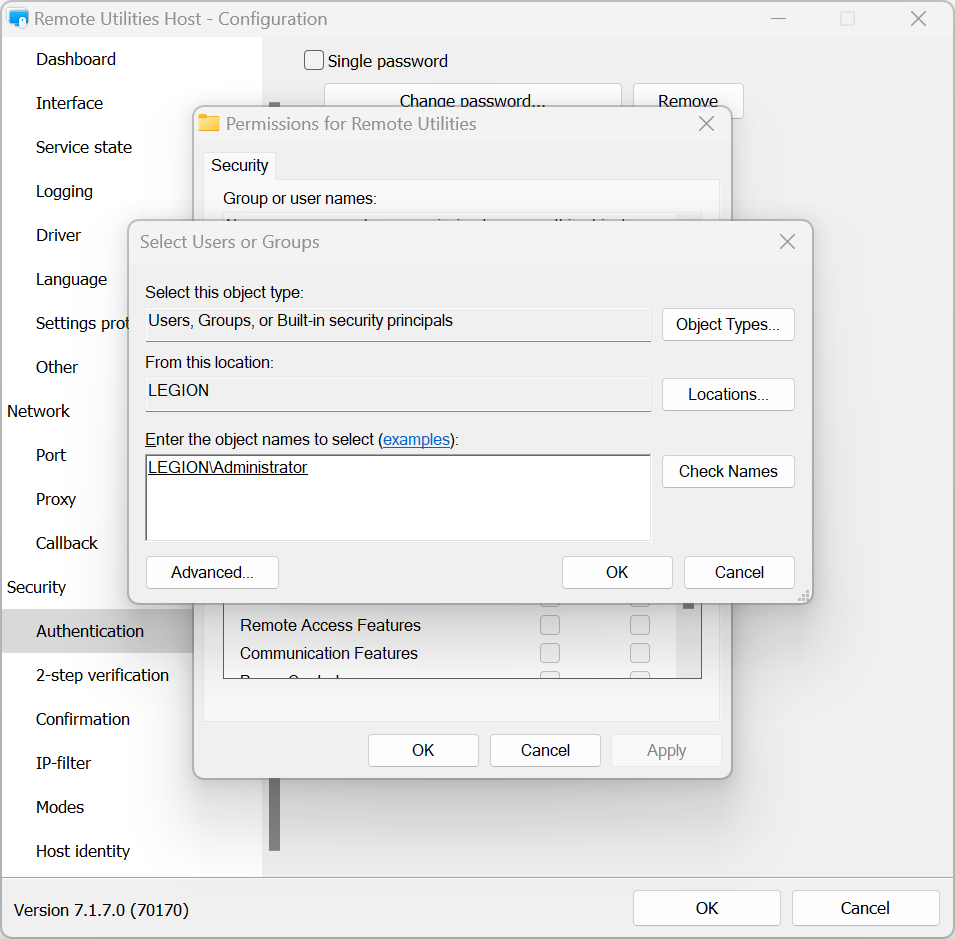
- Select Windows accounts that you want to grant or deny access to this Host and click OK.
- Set connection mode permissions for this account and click OK:
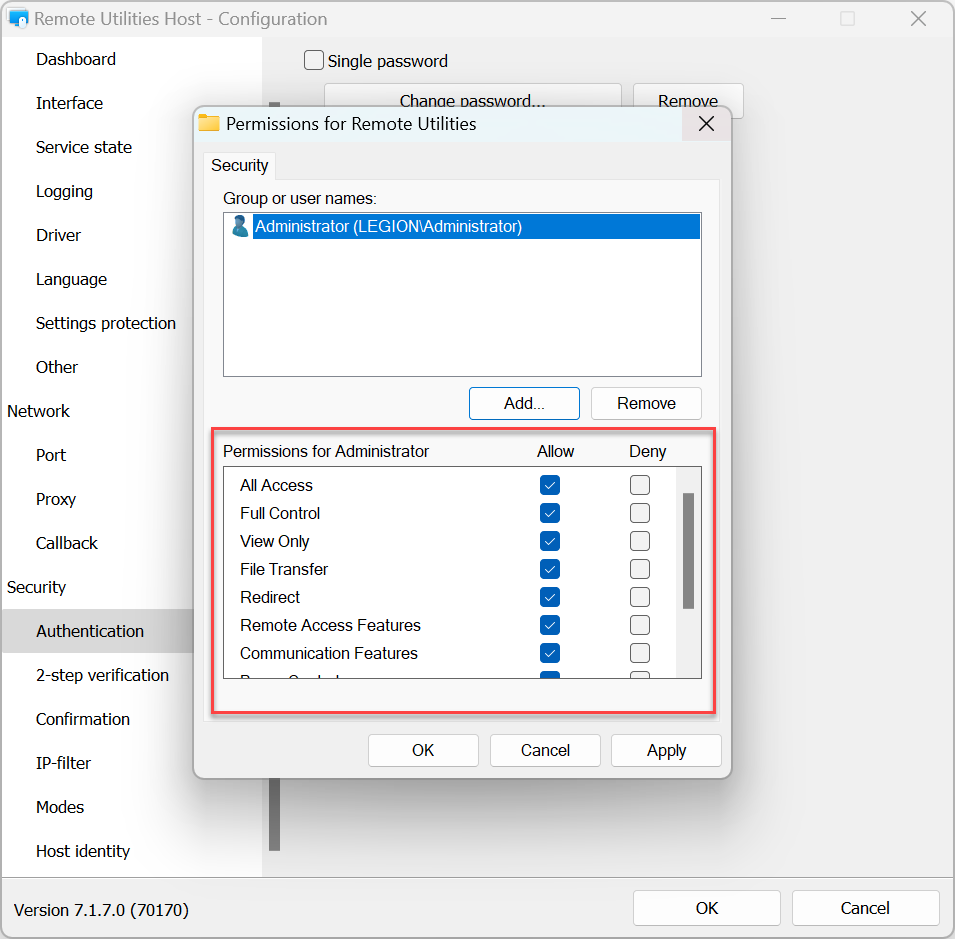
- To apply the settings click OK and close the Host settings window.
Custom server security
Custom server security allows you to use RU Server as your authentication server. Please refer to the Set up authentication server guide.
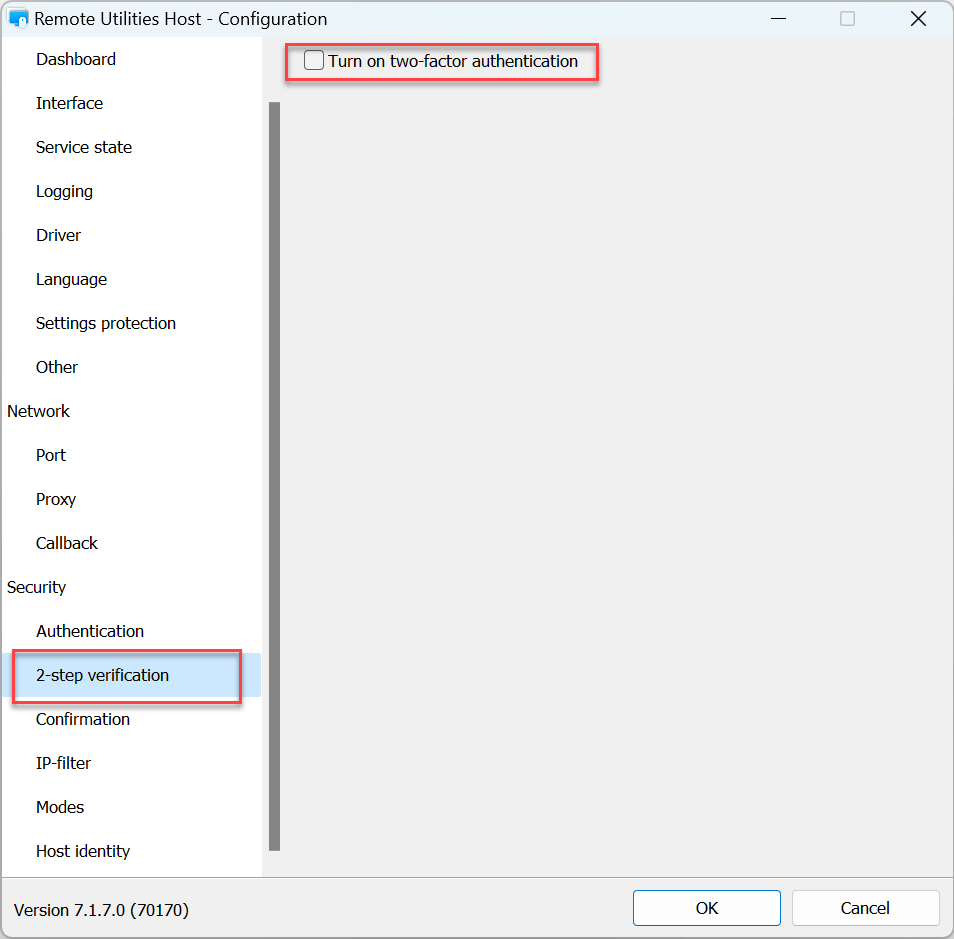
2-step verification
Two-step verification (also "two-factor authentication", or 2FA) adds another layer of security to make sure your Hosts are well protected against unauthorized access even if someone guessed your access credentials.
To turn on 2-step verification on a Host:
- In the Settings for Host go to 2-step verification and select Turn on 2-step verification.
- Use a mobile authenticator app to scan the QR code shown in window. We recommend using Google Authenticator app or Microsoft Authenticator app for smartphones:
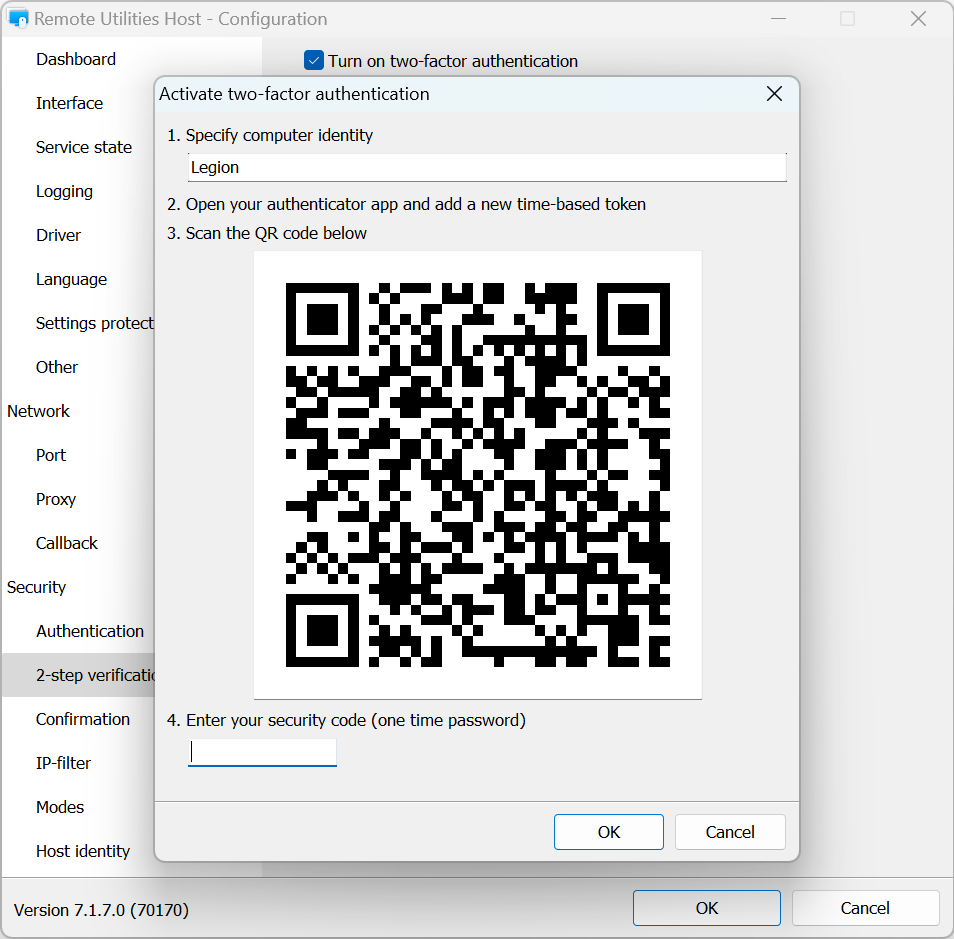
- Enter the numeric code shown in your authenticator app and click OK:
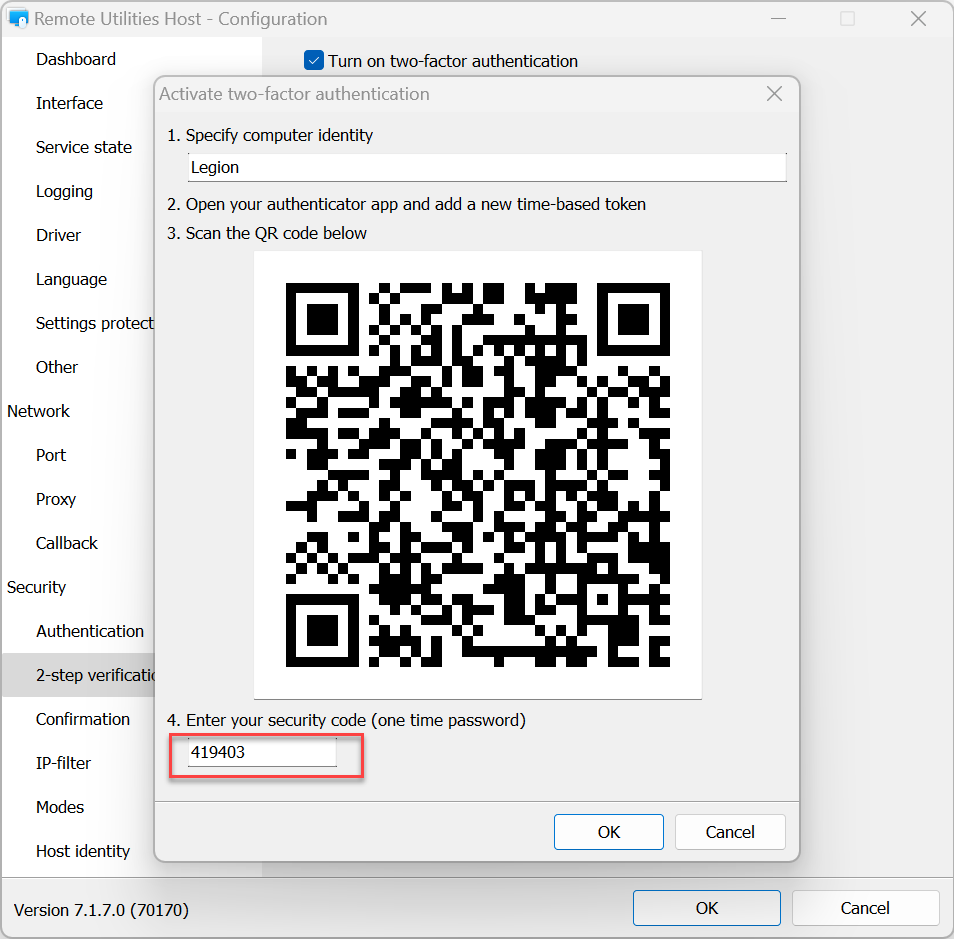
- 2-factor authentication has been set up. Click OK to close the settings. Next time you connect to the Host from Viewer you will be asked for an OTP (one-time password) shown in your authenticator app.
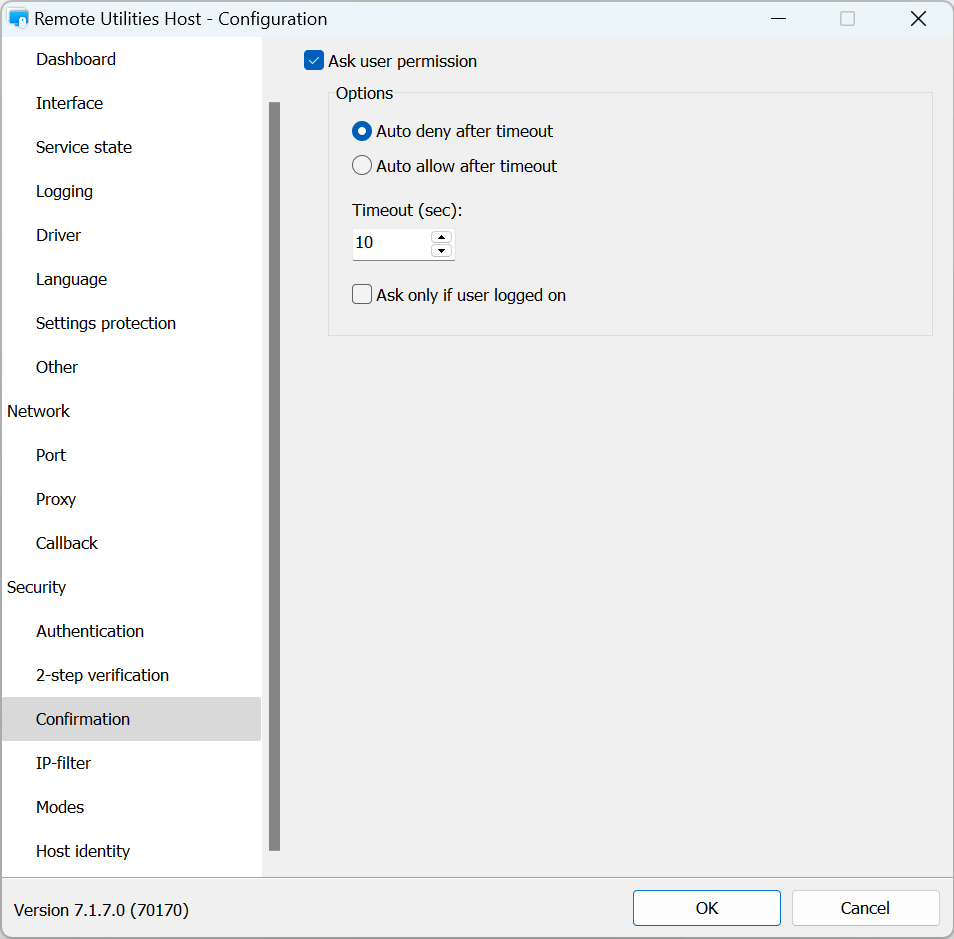
Confirmation
In the Confirmation tab you can turn on Ask user permission:
IP-filter
Use IP-filtering to restrict access to this Host from a specific IP address or IP address range:
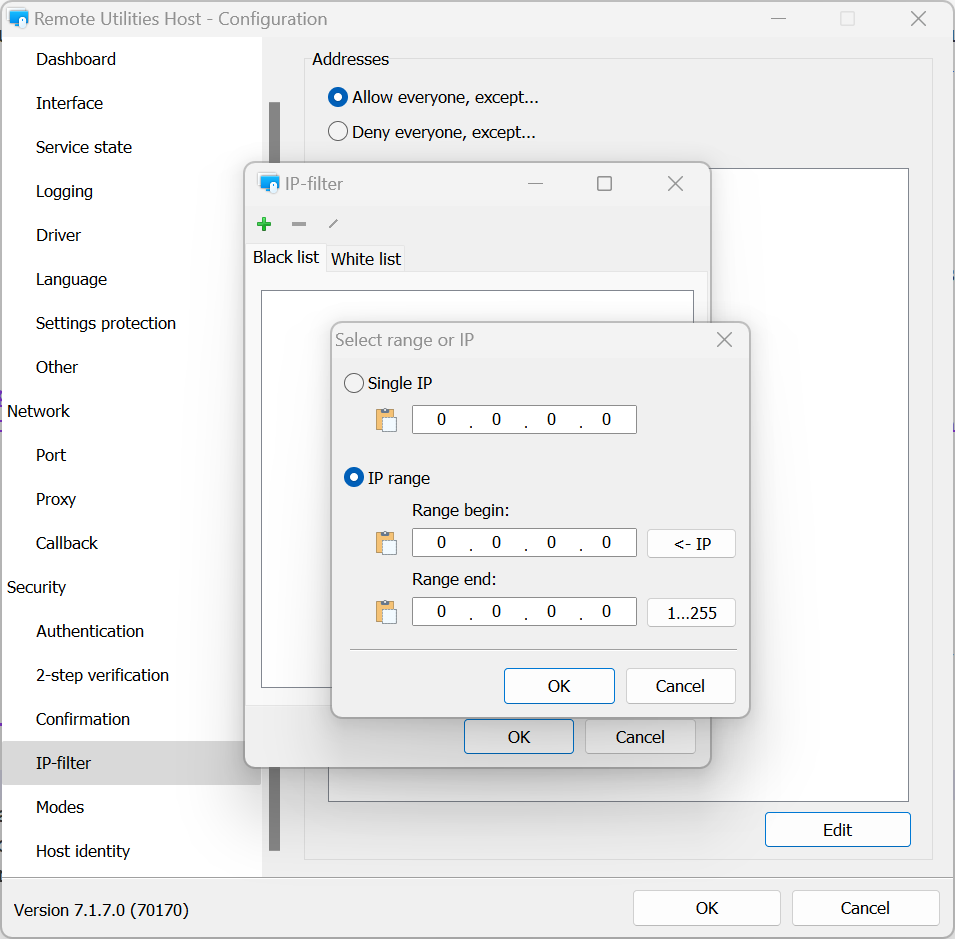
- Allow everyone, except—add an IP address or range to the black list.
- Deny everyone, except—add an IP address or range to the white list.
- Edit—click to specify an IP address or a range.
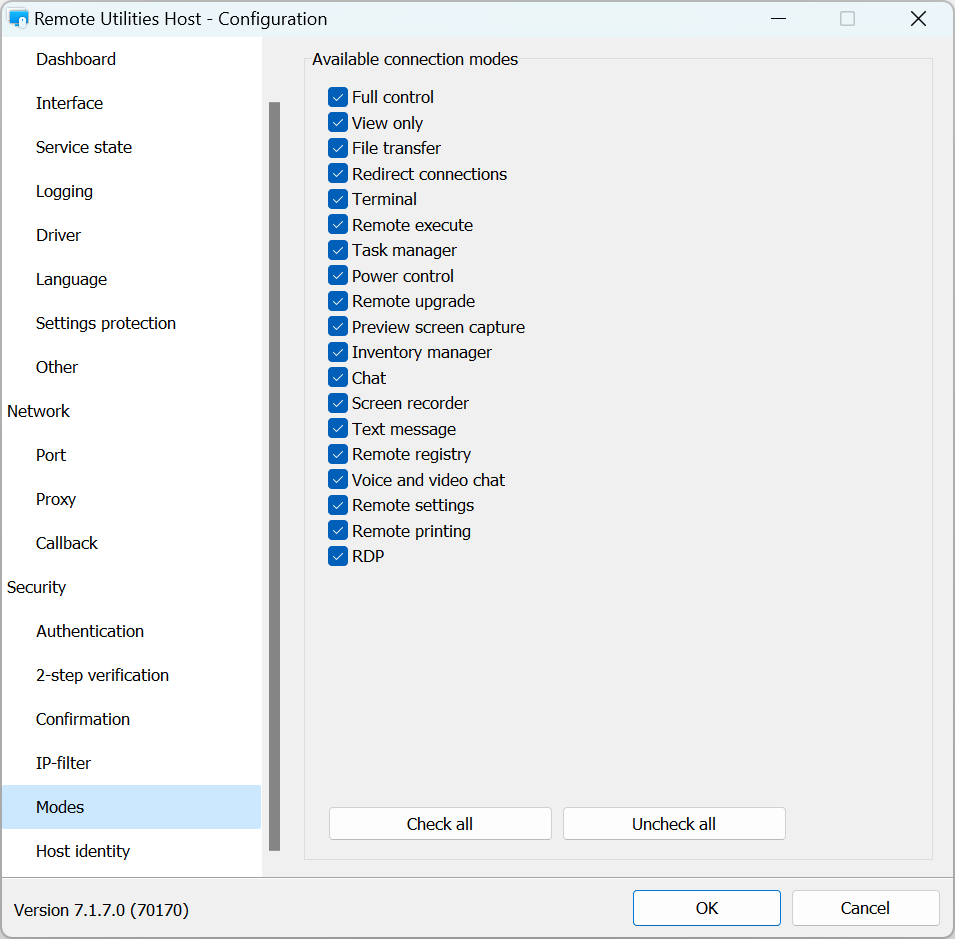
Modes
Use the Modes tab to allow or deny connection modes on this Host for all users and all authentication methods. To fine tune access permissions for specific users use the respective authentication method settings.
Host identity
Remote Utilities has a certificate-based Host identity check mechanism. This mechanism works automatically and doesn't require any configuration on the user's part.
You can view and export the current Host certificate in the Host identity tab:

You can re-issue a certificate manually if needed by clicking on Generate new.
If the Host certificate differs from the one stored by the Viewer, a warning message appears on the Viewer side:
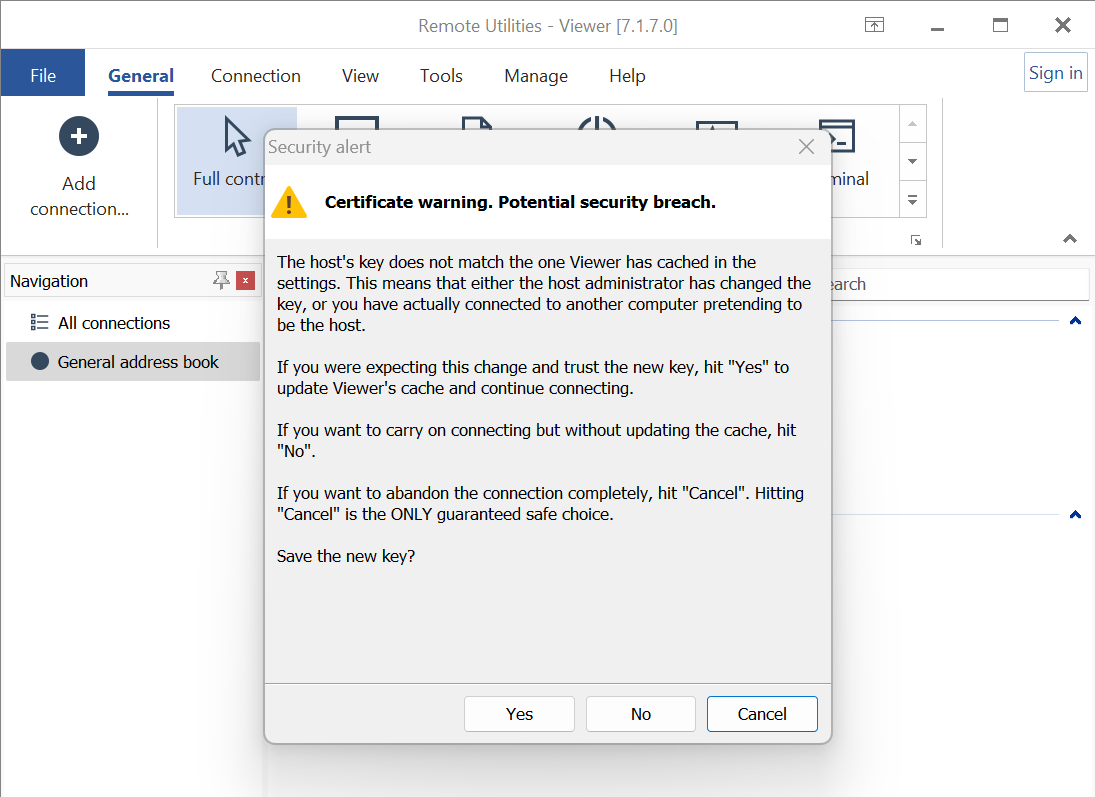
If you believe that this is the same Host installation that you previously connected to (e.g. you re-installed the Host and the certificate was renewed), click Yes. This will update the certificate cache on the Viewer side. Otherwise choose No.