Manage Licenses using RU Server
Overview
Use RU Server as a central storage for your license keys and make it the "registration server" for your team members.
License keys stored on the server will not be available to them directly. This allows you to keep your license keys safe while letting your team members register their Viewers according to the permissions that you set.
Create user accounts
You must create user accounts for your team members first.
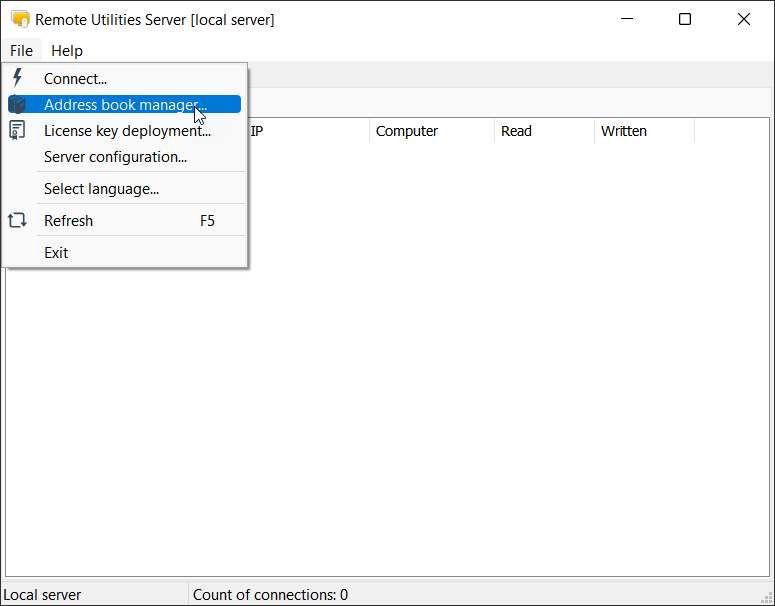
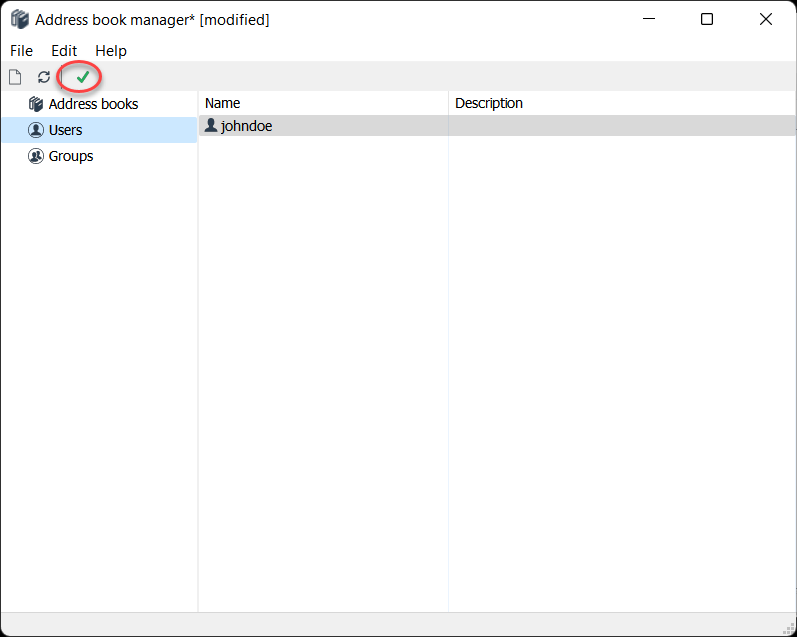
- In Admin Console go to File➝Address Book Manager.
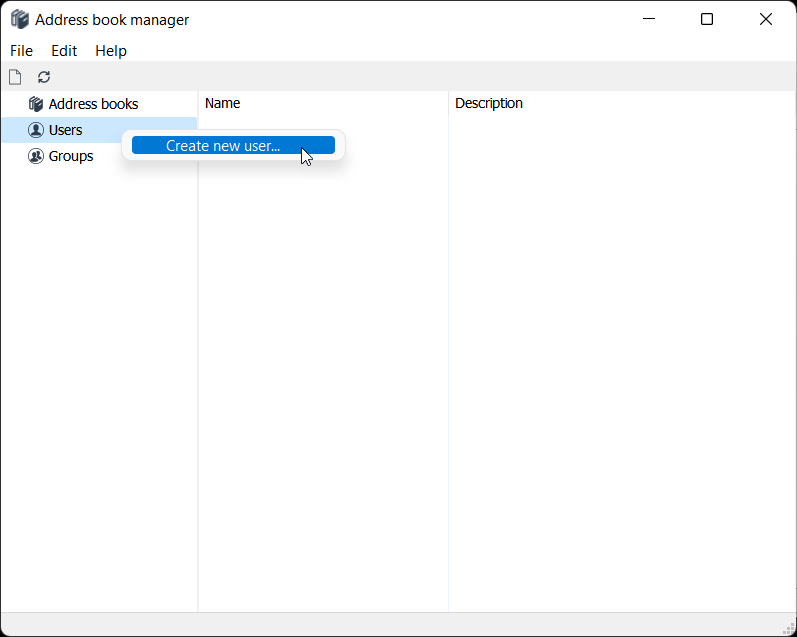
- In the left pane, right-click Users and select Create new user.
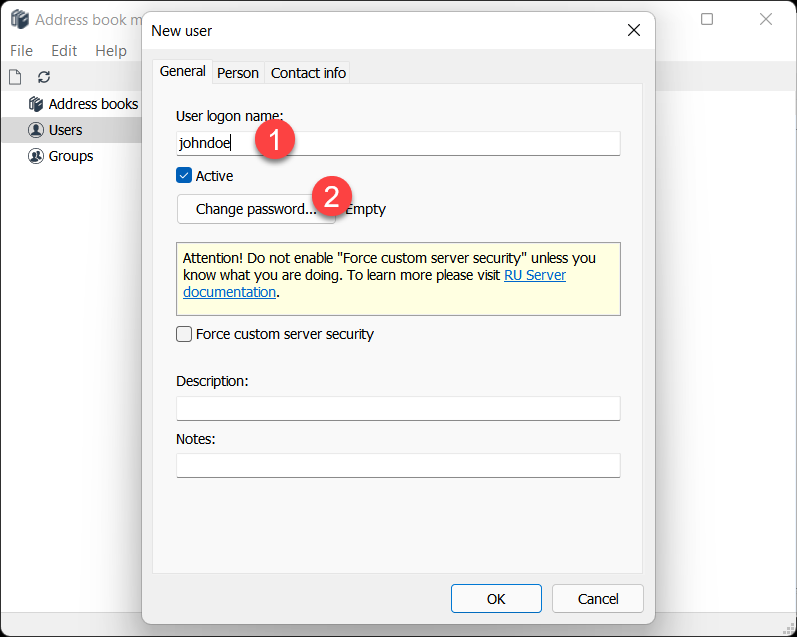
- Enter user login and click Change password.
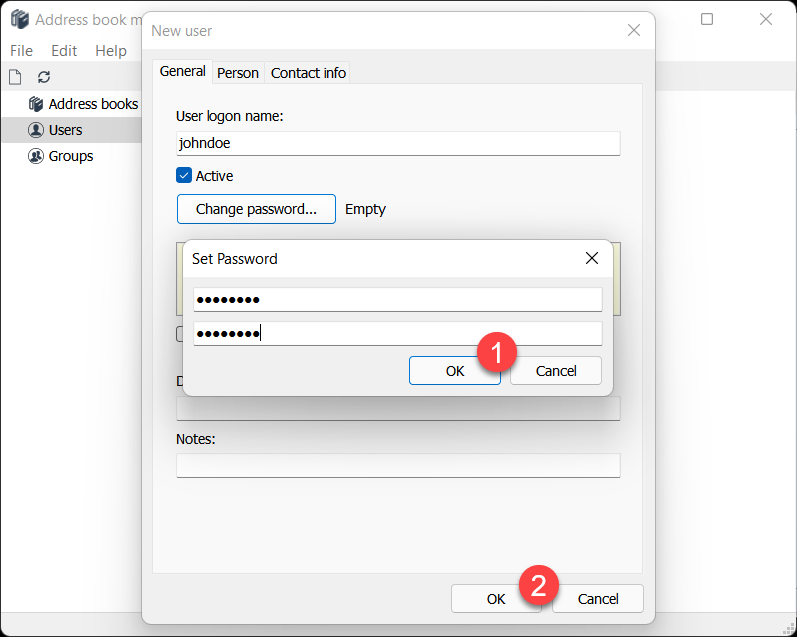
- Set and confirm a new password. Click OK and close the New user dialog.
- Remember to apply changes you made by clicking the green tick icon on the toolbar.
You can create as many users as you need and create groups for easier user management. You can apply permissions not just to users, but also to groups.
Add and assign license keys to users
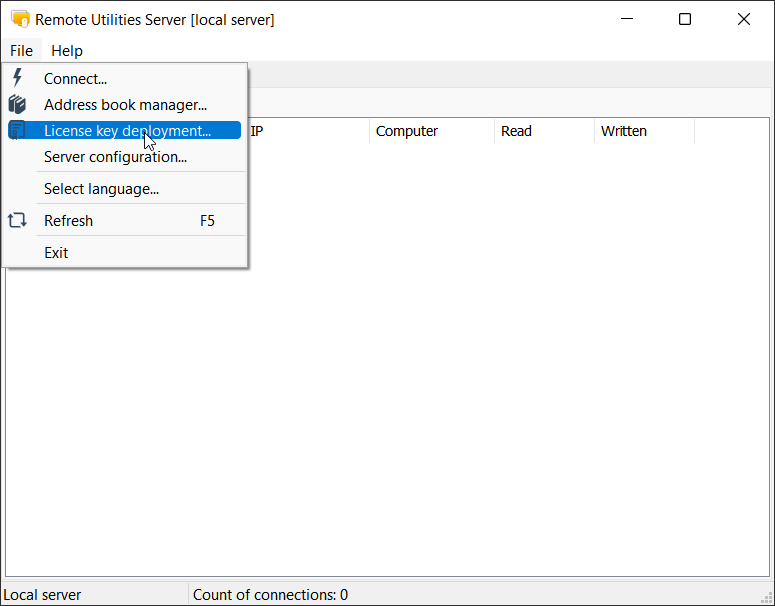
- In Admin Console go to File➝License key deployment.
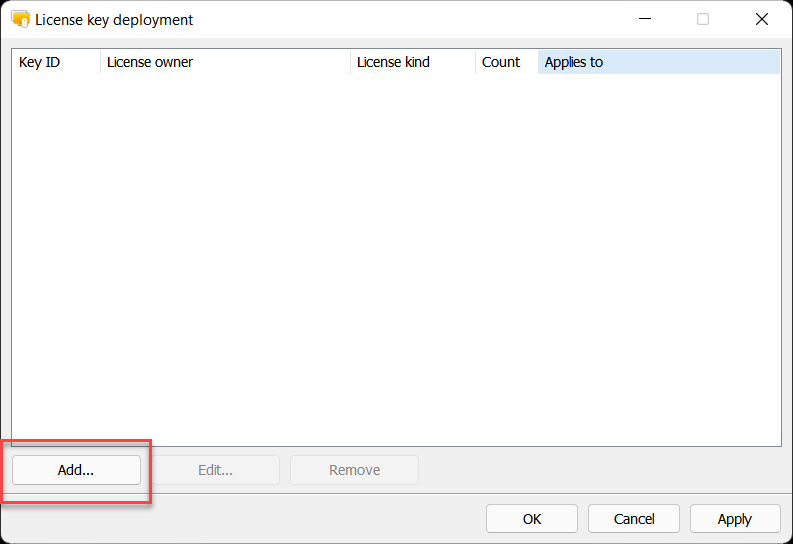
- Click Add.
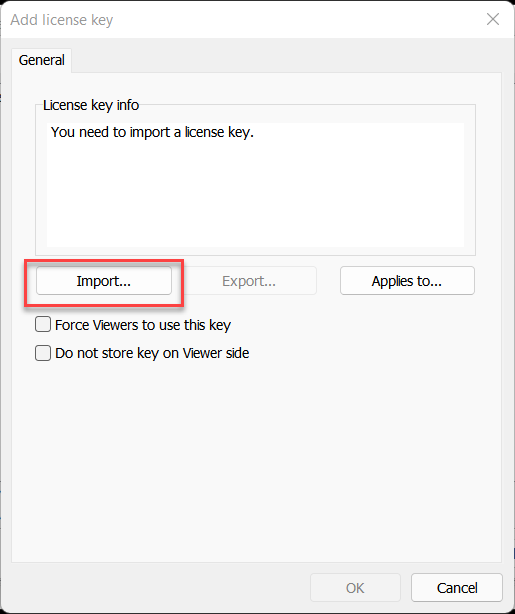
- In the Add license key dialog click Import.
- A standard Windows Open dialog will appear. Navigate to the folder with your license key file (key.rlicense), select the file and click Open.
- Verify your license key information in the Add license key dialog and click Applies to.
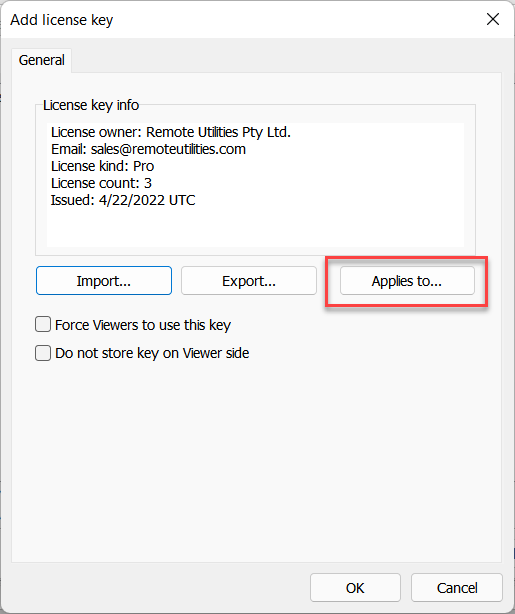
- Click Add.
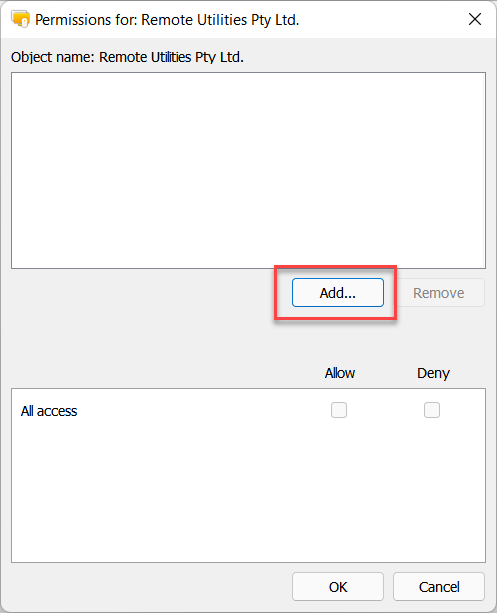
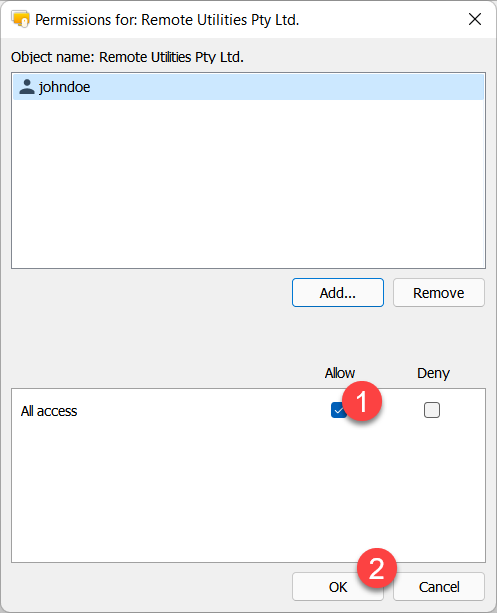
- In the Select Users or Groups dialog select the user and click Select.

- Make sure the Allow option is selected and click OK.
- You can optionally turn on Force Viewers to use this key and Do not store key on Viewer side. These options are explained below.
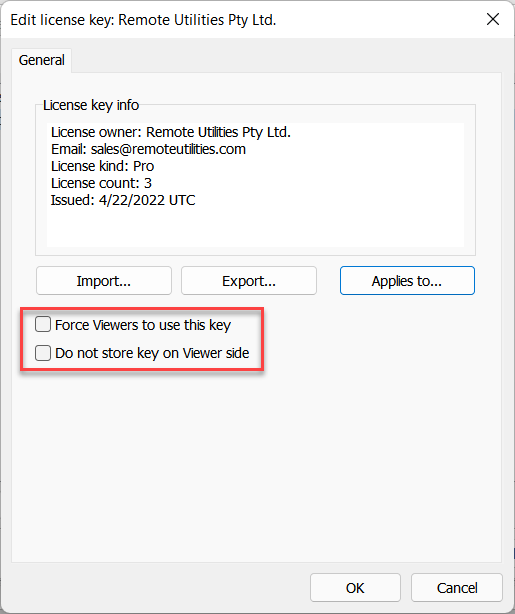
- Force Viewers to use this key—when the user signs in on the server, their Viewer will be forced to only use the provided key and all other keys will be deleted from Viewer. This option should be used with caution.
- Do not store key on Viewer side—if this option is turned on, the license key will be removed from Viewer when the user signs out from the server (Viewer will revert to the trial mode state). In order to register Viewer, the user must sign in back on the server.
- Click OK and close the License key deployment window.
For simplicity, only one license key and one user were shown in this tutorial. However, you can add multiple keys and assign them to multiple users and groups. Also, setting permissions for groups rather than for individual users may be a better strategy.
How it works on the Viewer side
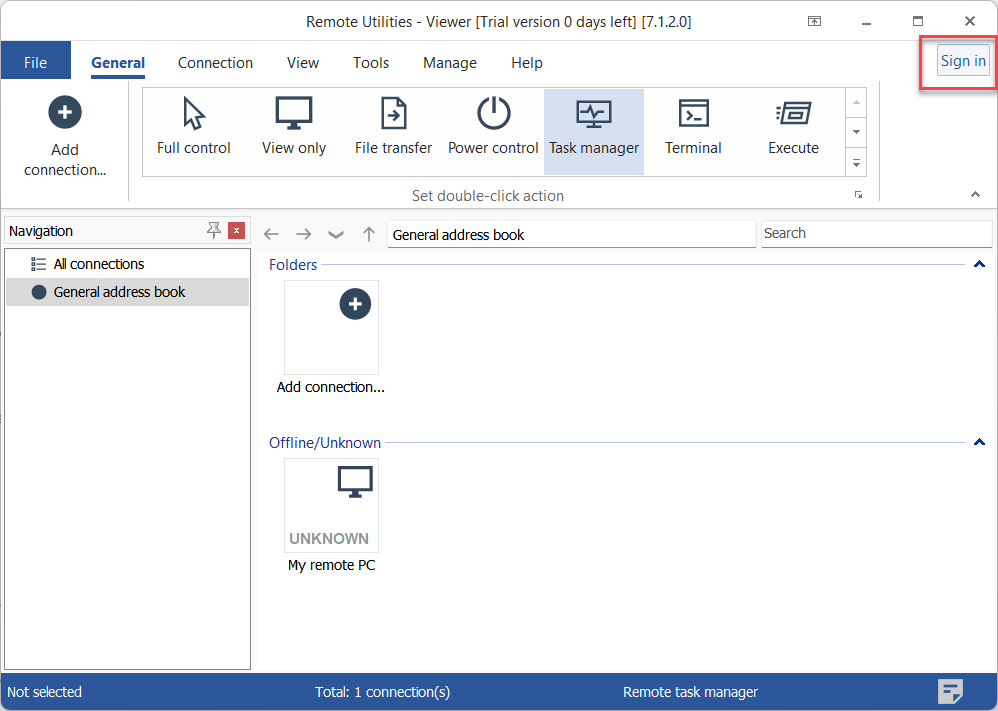
- In Viewer main window click Sign in.
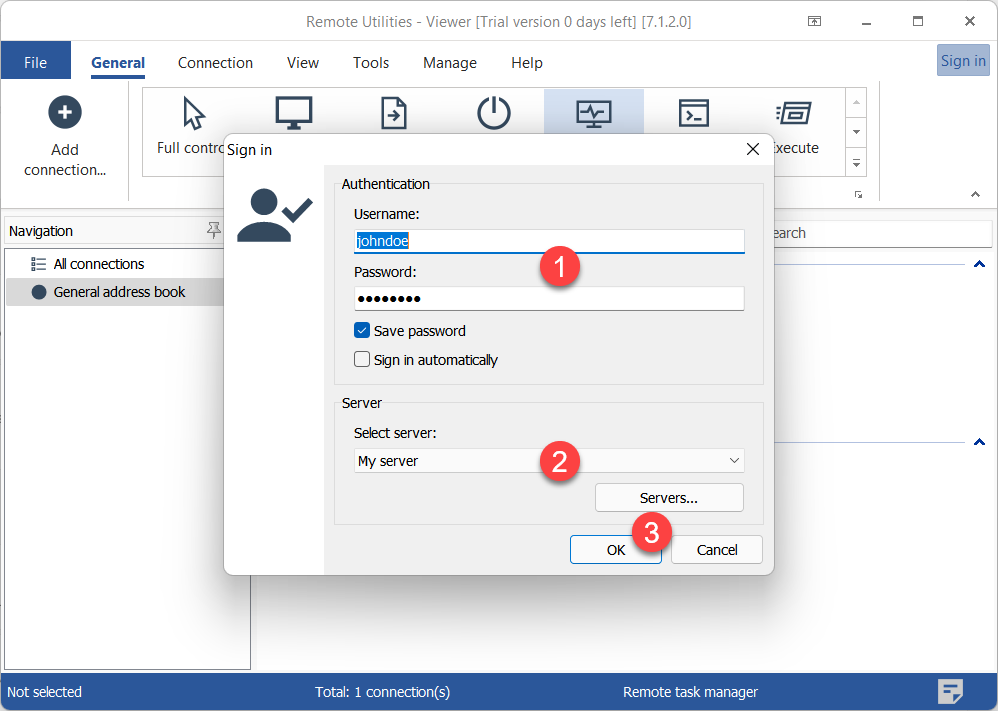
- Enter the user credentials, select the server from the drop down list and click OK. If no server has been added to the list yet, do so by clicking the Servers button.
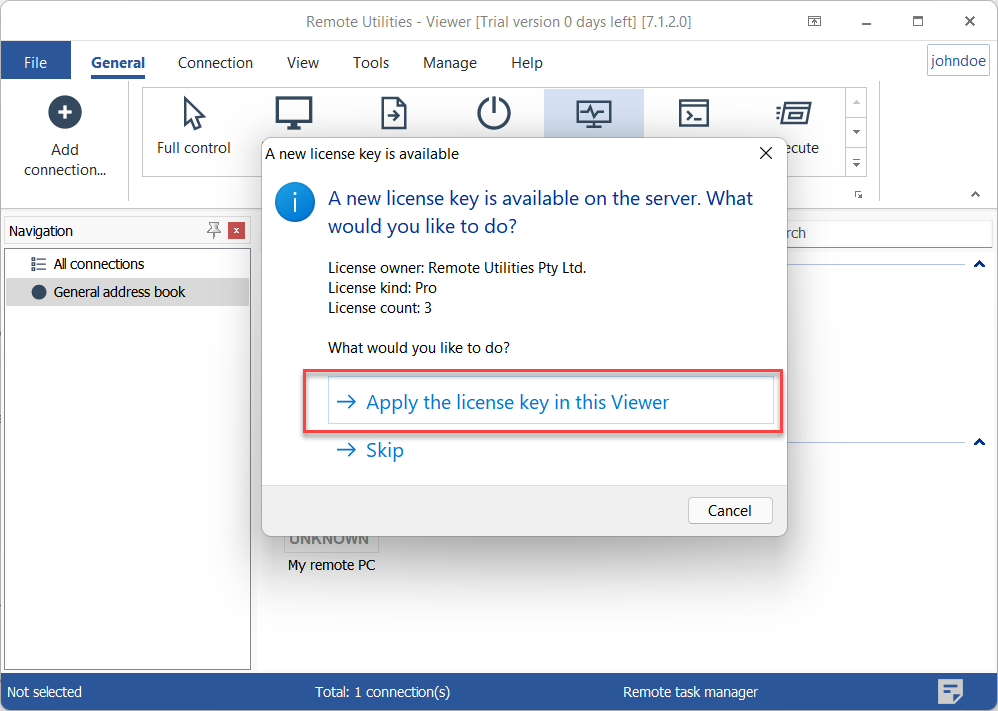
- A message will appear that notifies the user about a license key available on the server. Click Apply the license key in this Viewer. This will register Viewer with that license key.
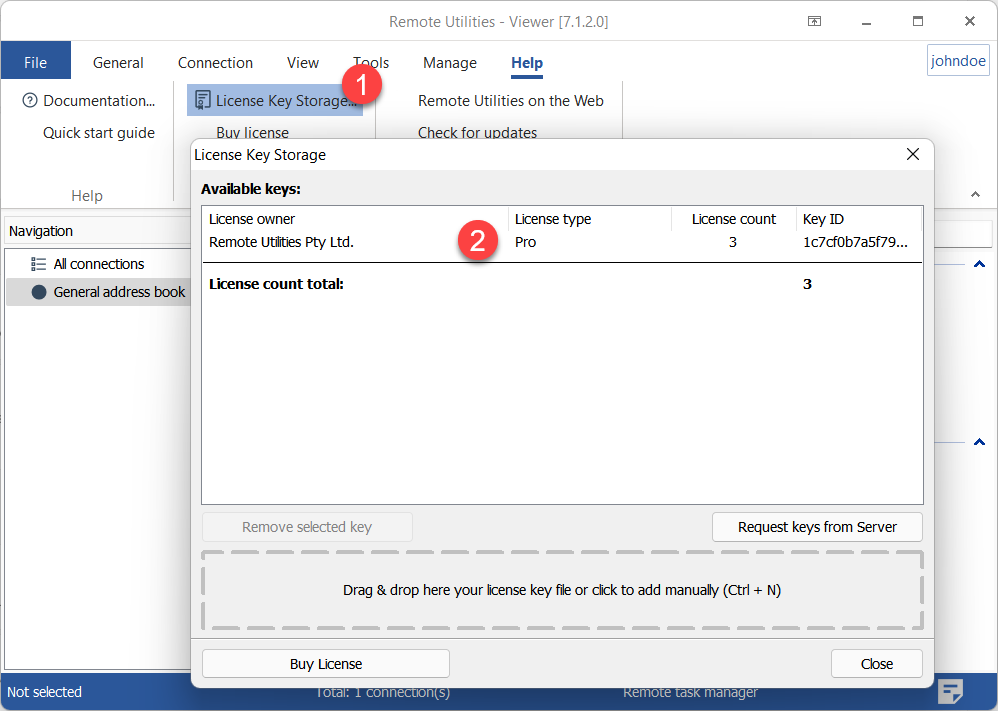
- To verify that Viewer has been registered go to Help→License key storage. The key is shown in the License key storage window.
If Viewer has already been registered with another license key, and the user agrees to apply the server key—two outcomes are possible:
- If Viewer key is the same type as the server key (e.g. both keys are the Starter license)—the Viewer key will remain in the storage and the server key will be added. This will result in two keys in the storage.
- If Viewer and server keys are of different types—the server key will replace the existing Viewer key.