Remote Utilities 7 has been released
Upgrading your Remote Utilities to version 7.x.x.x has a lot of benefits, especially for corporate users in multi-user scenarios. Let's see what you can get with the new version.
Important!
Upgrading to Remote Utilities 7.x.x.x also requires upgrading your license key to v.7.x.x.x. License keys for version 6.x.x.x are not compatibile with v.7.x.x.x. Visit this page to learn about your upgrade options and upgrade your key.
Active Directory Integration
How it used to be
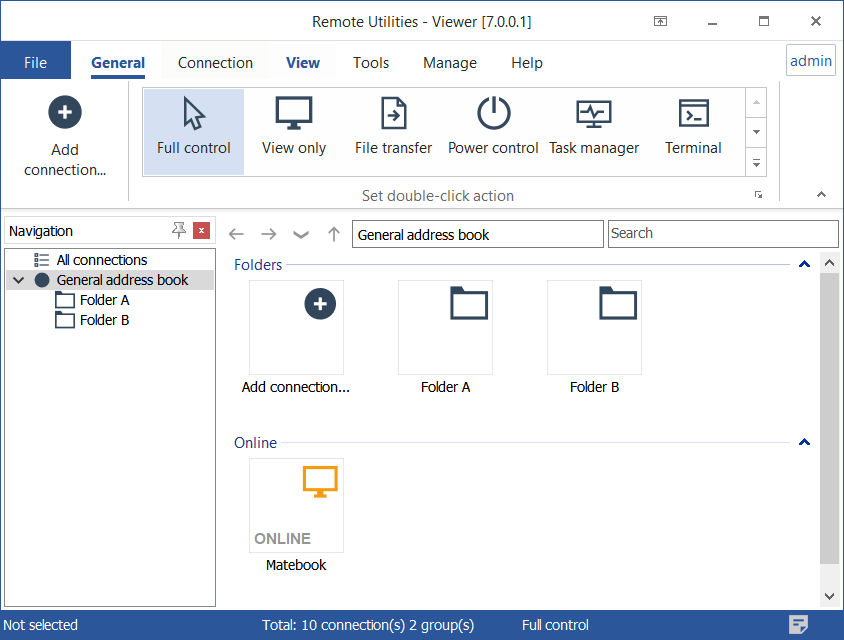
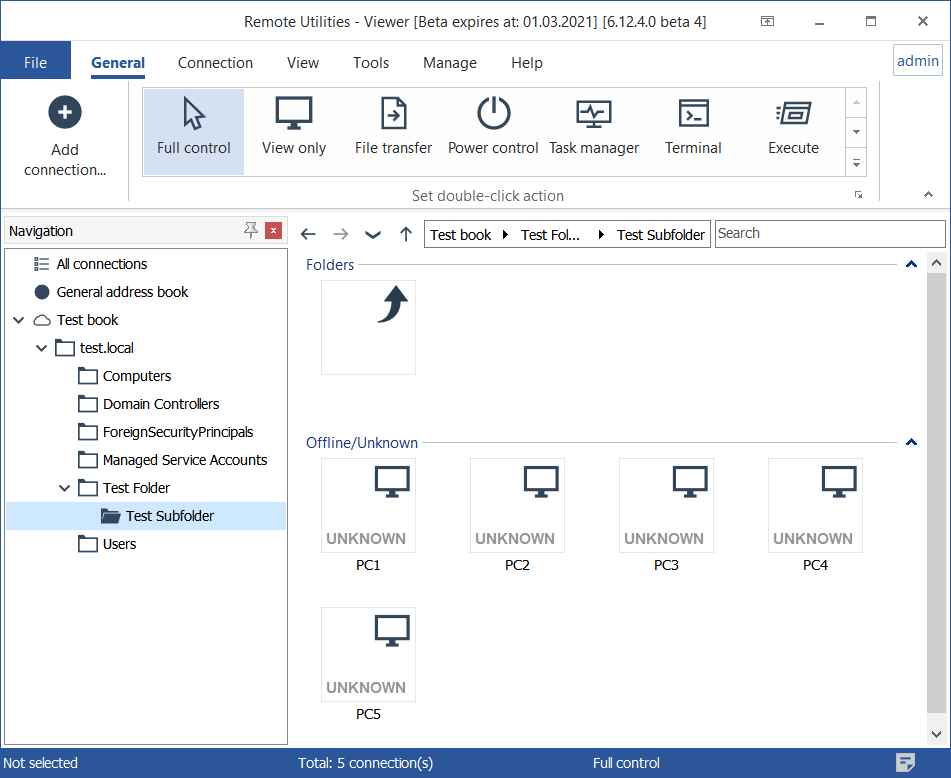
Fetching computers from Active Directory directly into the Viewer (see the figure below) has always been available in Remote Utilities. Up until now this has been the only method of RU/AD integration, and not without its drawbacks.
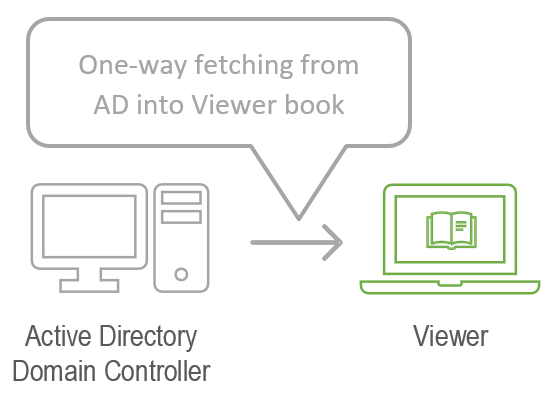
The biggest issue of this method is that it doesn't support a multi-user scenario. Each administrator had to set up Active Directory integration in their own Viewer.
Another drawback is that the fetched AD items in Viewer cannot be edited. You have to "convert" those records into regular address book items first to be able to edit their connection properties.
New AD integration
In version 7, Active Directory integration has been taken to a new level. You can integrate RU with Active Directory using Remote Utilities Server:
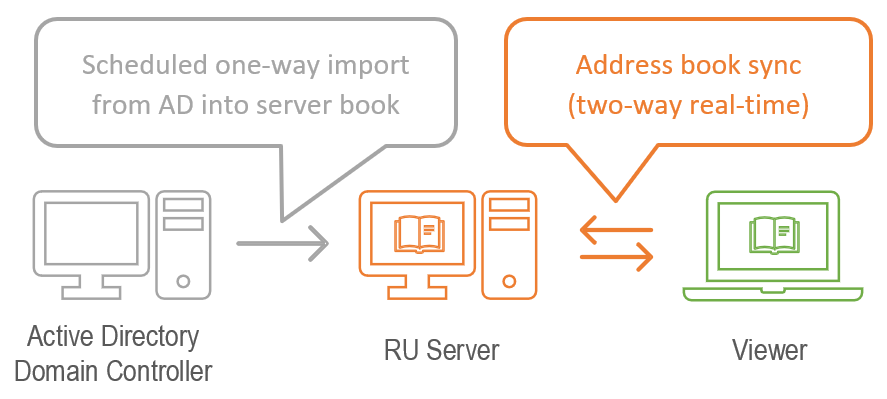
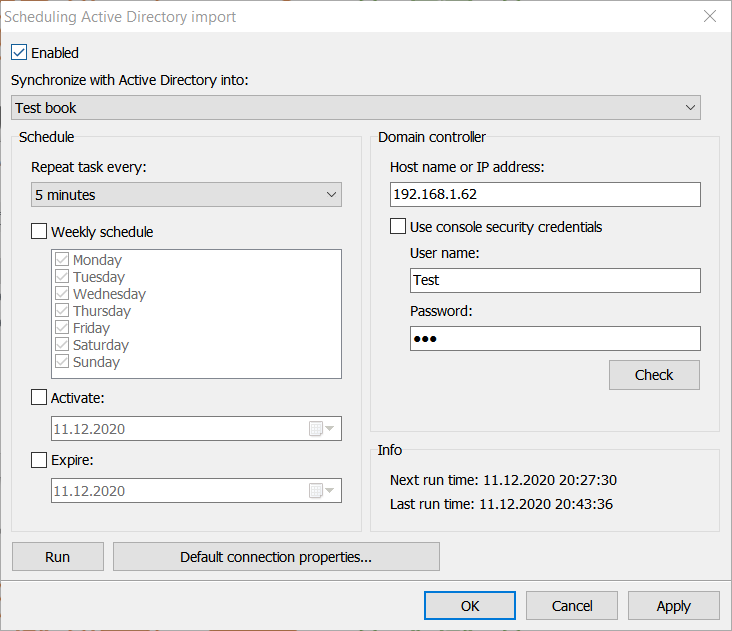
RU Server can now communicate with an AD domain controller and import computers into the server address book on a schedule. You can set schedule and specify the AD controller in a dedicated dialog window:
AD computers are imported into the designated Server address book on schedule:

The server address book can be synced between multiple Viewers — using the address book synchronization feature:
On the Viewer side you can choose if you want to use your own connection properties in a synced book:

With RU Server / AD integration you have a much better alternative to just fetching AD records directly into the Viewer.
Centralized License Key Management
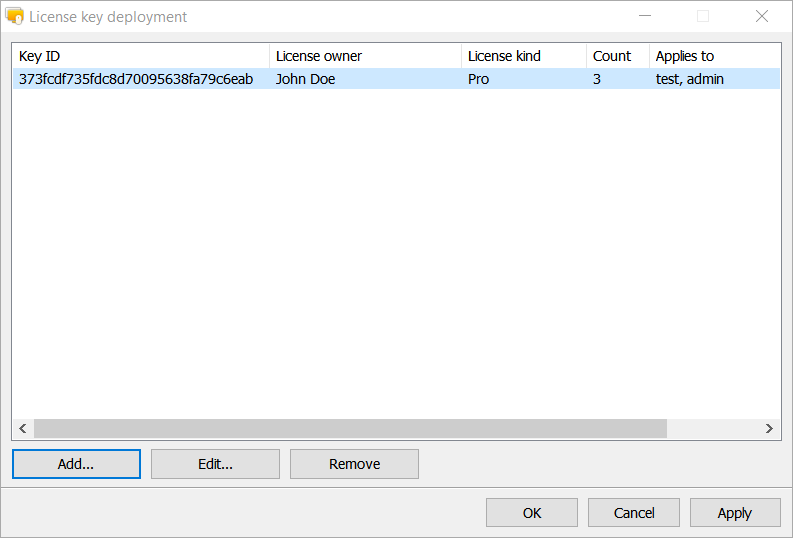
If you are using RU Server in a multi-user environment, then this function is for you. Now you can manage license keys centrally on your RU Server and assign license keys to connected Viewers.
Here is how it works. First, add your license keys to RU Server:
When adding your keys you can set additonal options, such as forcing signed-in Viewers to only use this key and clear the license key on the Viewer when it disconnects from Server:
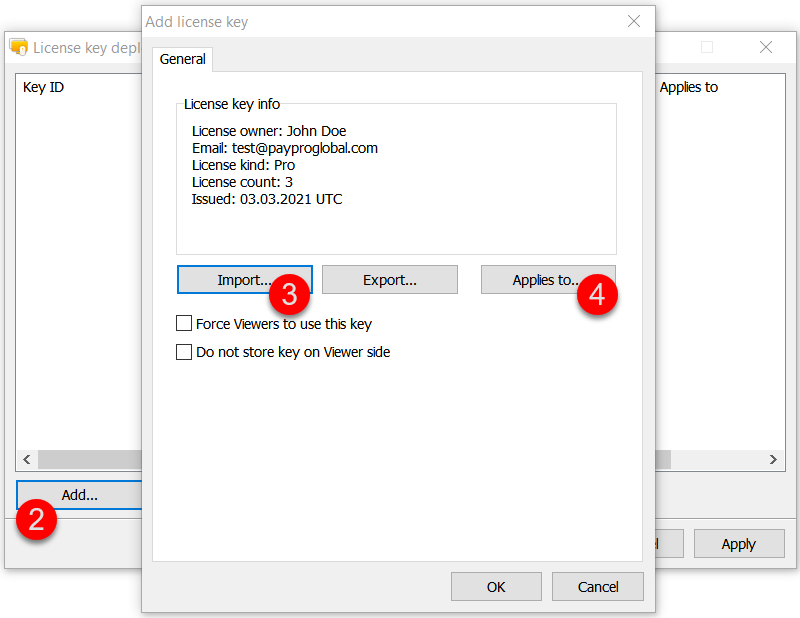
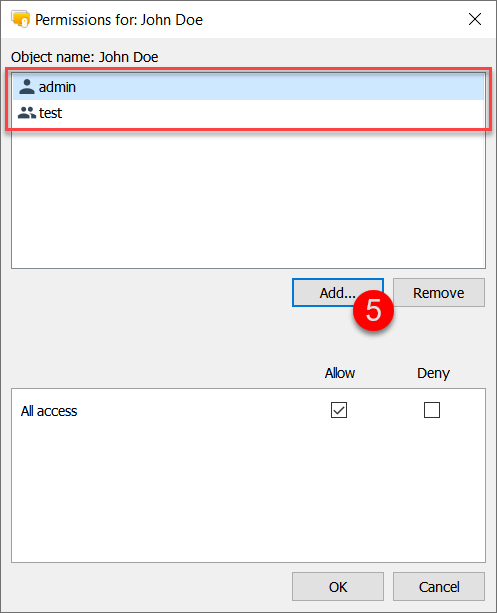
Apply the license key to accounts and/or groups that you created on RU Server:
The license keys that you added are displayed in the manager window:
If Viewer is signed in on RU Server and there are license keys available the License key storage will show the Request keys from Server button:
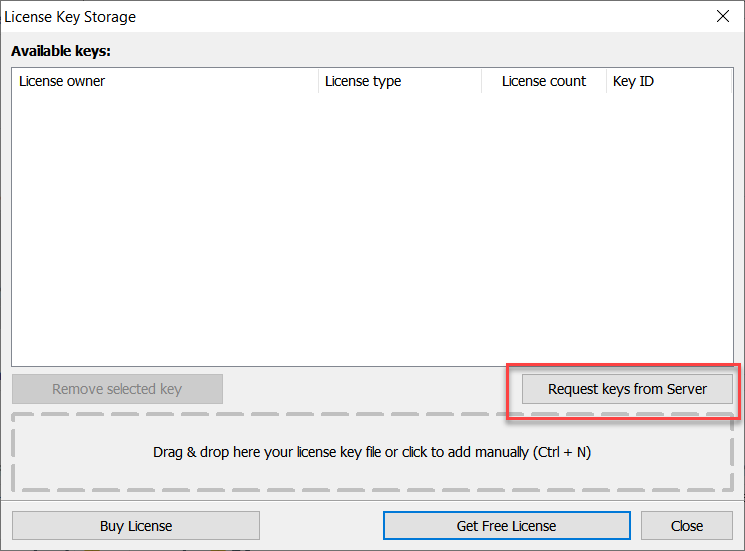
If you click on the button, the program will ask if you want to add the key to this Viewer:

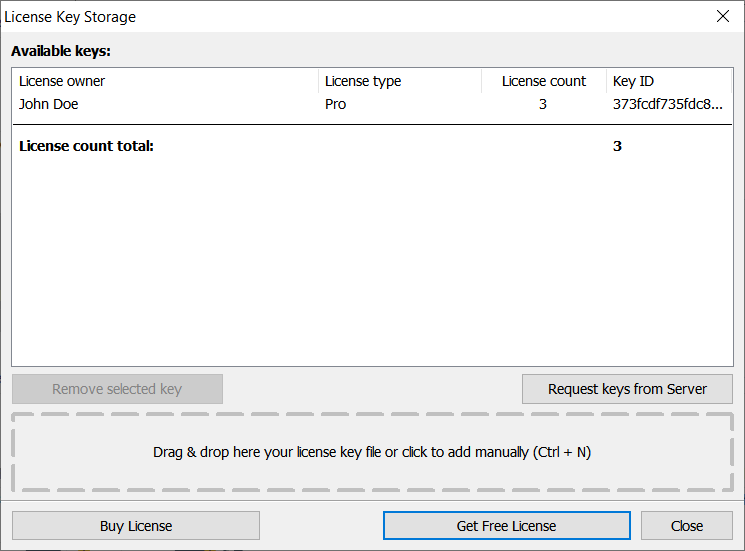
Hit Apply... The key will get added to Viewer's License key storage and register the Viewer.
File Transfer navigation speed
Folder navigation/browsing in the File Transfer mode is now much faster than it used to be in version 6.x.x.x.
Important: The File Transfer protocol has been re-written from ground up. This means that the File Transfer mode will only work if Viewer and Host are both version 7.x.x.x.
Remote folders opening slow in version 6.x.x.x and earlier:
Remote folders opening fast in version 7.x.x.x:
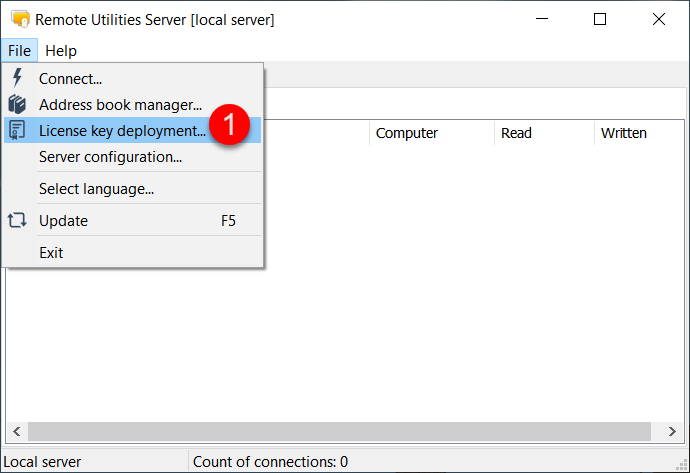
New Port manager in RU Server
Port Manager is a dialog window that replaced the previously used port list. In order to run Port Manager, in RU Server Admin Console select File → Server Configuration, navigate to the Communication tab and click Port Manager:

You can still add multiple ports. However, now you can assign different roles to different ports:
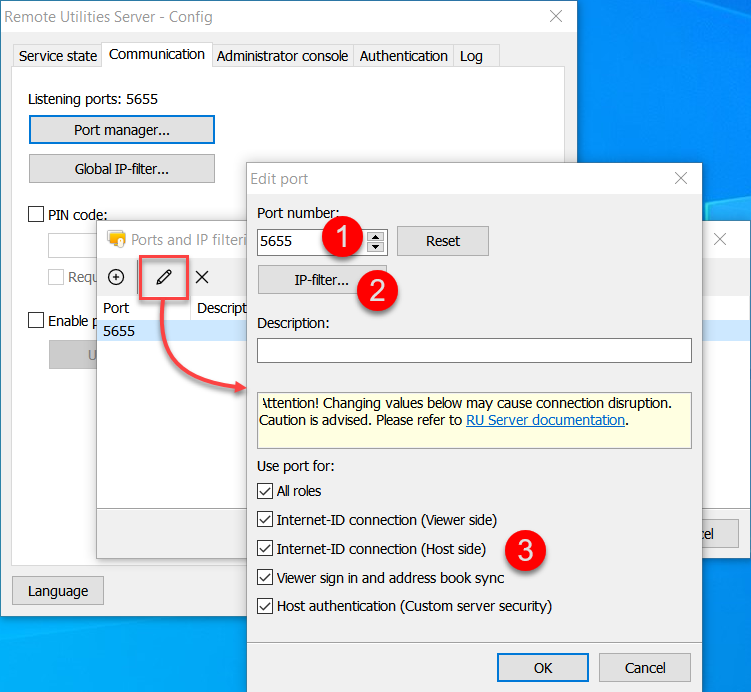
- Port number. This is self-explanatory.
- IP-Filter. A port-level IP-filter.
- Use port for. Here you can select the roles that you want to assign to this port.
For example you can have a dedicated port for Server-to-Viewer connections and another port for Server-to-Host connections.
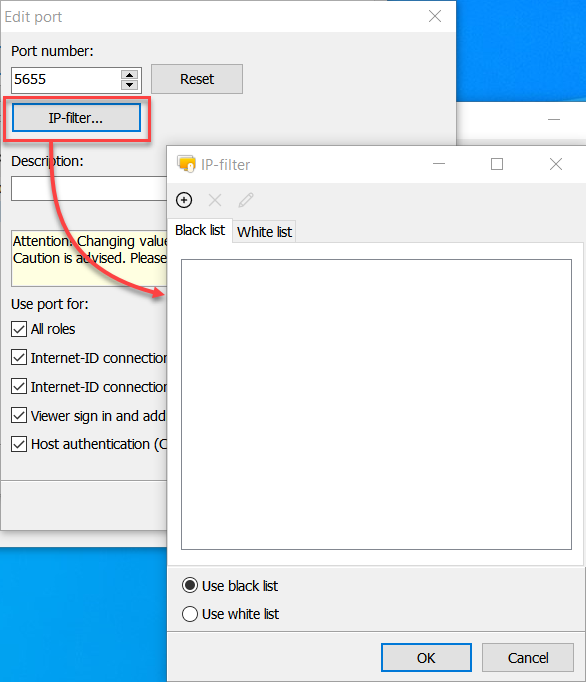
Port-level IP Filter vs Global IP Filter
In the new Port Manager each port has its individual IP filter. There is also the global IP filter available on the Communication tab.
Using port-level IP filters is straightforward. You should decide whether you want to use a black list or a white list and then add the desired IP address or IP address range in the respective list:
What if you use the global IP filter together with your port-level filters? The following rules apply in the order listed:
- Deny (blacklist) rules override allow (whitelist) rules.
- Global rules override port-level rules.
For example, if you black list a single IP address in the Global filter and white list the same IP address in a port-level filter, the IP address will be denied/blocked. However, if you white list a single IP address in the Global filter and black list the same IP address in a port-level filter the IP address will still be blocked because a deny rule, though local, still overrides a global allow rule.
Port roles
Each port can be assigned one or more roles from the list below.
- Internet-ID connection (Viewer side)
- Internet-ID connection (Host side)
- Viewer sign in and address book sync
- Host authentication (Custom server security)
By selecting these checkboxes you are telling the program what this port should be used for.
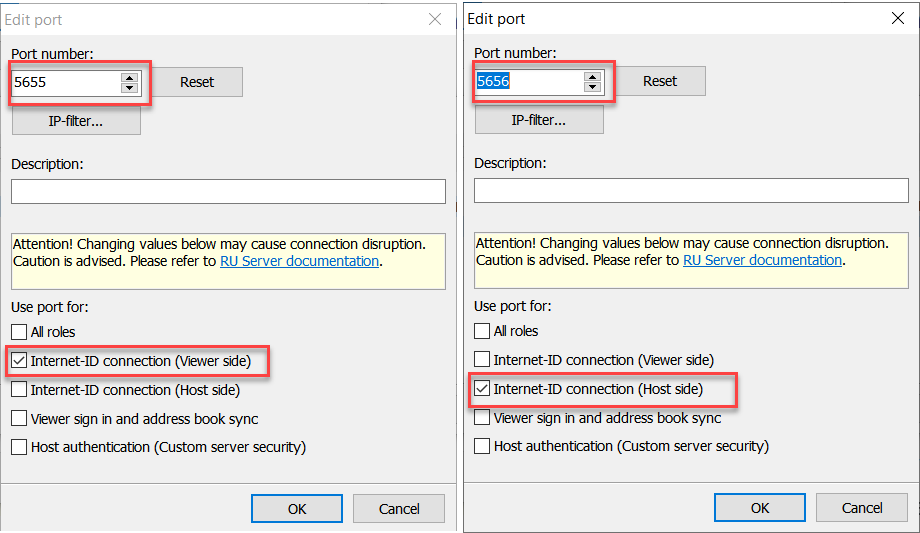
For example, you may decide that the port 5655 should only be used for Server ↔ Viewer communication and the port 5656 should be used for Server ↔ Host communication:
The selected roles are also shown in the Port Manager:
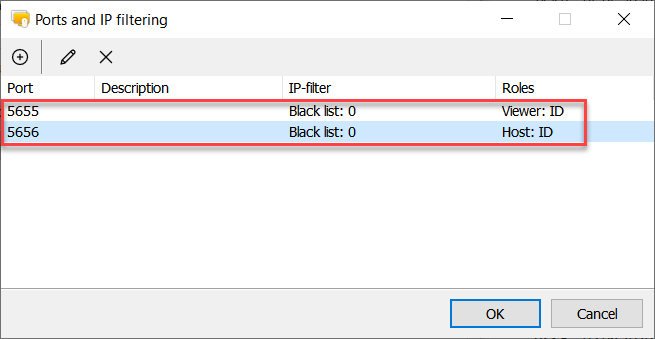
In this example Viewer will communicate with RU Server using TCP port 5655 and Host will communicate with RU Server using TCP port 5656.
Why use port roles at all?
Assigning separate ports for Viewer and Host in combination with setting port-level IP filters gives the system administrator more flexibility and control over Server ↔ Viewer and Server ↔ Host communication.
For instance, the system administrator may choose to allow any Viewer to communicate with the Server regardless of the Viewer's IP address. The system administrator also wants to proactively prevent "unwanted" Hosts (e.g. Hosts installed by employees without permission) from communicating with the Server and opening a hole in the defenses.
No more scaling issues on high DPI devices
Remote Utilities now scales well on 2k/4k monitors. Viewer, Host, Agent and Server windows should scale well at any resolutions and DPI settings.
Windows event log
In addition to writing log into a file Host can now write it into the Windows system log.
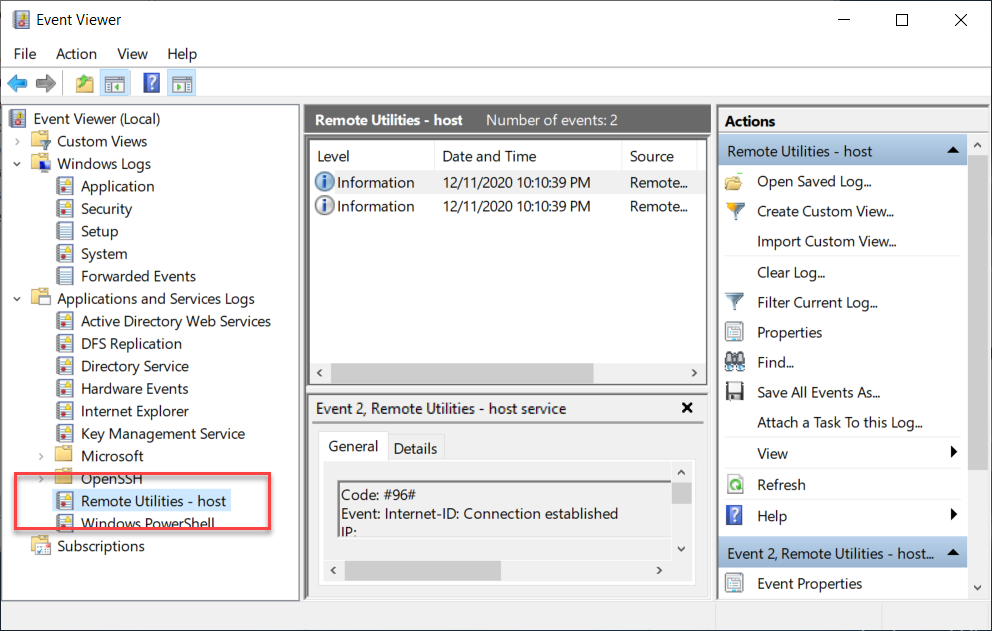
To use this feature, you must first enable it in the Host settings and restart Host:
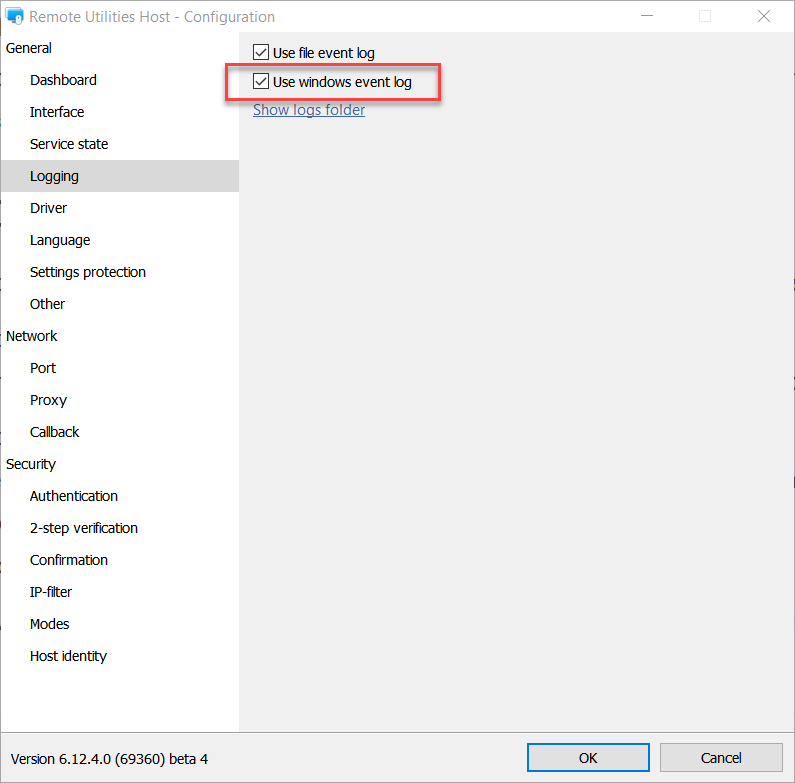
Same information is recorded in both logs. Enabling Windows event log may be justified if you systematize and collect logs across multiple computers, for example using Active Directory tools.
A complete list of new features and bug fixes in version 7 is available on the release notes page.