How do I migrate RU Server (self-hosted server) to another PC?
Overview
You want to migrate your RU Server to another machine and keep its current settings and data.
Locate RU Server data and settings
There are two locations:
- The program installation folder
C:\Program Files (x86)\Remote Utilities - Server\, namely:- The
datafolder is where the server copies of your synced address books are stored, if any. - The
Logsfolder keeps server system log. - The
statsfolder keeps a log of all Internet-ID connections established through the server.
- The
- The registry key
HKEY_LOCAL_MACHINE\SOFTWARE\Usoris\Remote Utilities\MiniInternetIdthat stores the server configuration settings.
Copy data and settings to new location
- Install RU Server on a new machine. See RU Server installation guide.
- Copy the folders
data,Logsandstats(see above) from the server installation folder on the old machine to the same folder on the new machine. Choose Replace existing when asked by the operating system. - On the old machine run Windows registry editor (regedit.exe), locate the registry key
HKEY_LOCAL_MACHINE\SOFTWARE\Usoris\Remote Utilities\MiniInternetId, right click on the key and select Export. Save the key as a.regfile. - On the new machine run Windows registry editor, go to File→Import and import the
.regfile you created in the previous step.
Update server address in Viewer
Important
Only do this step if the IP address or DNS name of your server has changed after migration.
Depending on which RU Server features you use, you might need to change the server address in two different places in Viewer:
- For address book sync—in the synced address book properties
- For Internet-ID connection—in connection properties
Update server address in synced address book
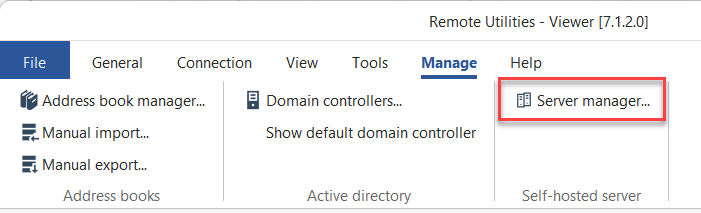
- Open Viewer and go to Manage→Server manager:
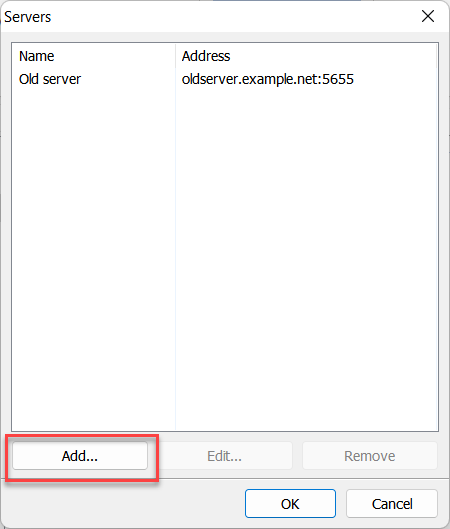
- Click Add:
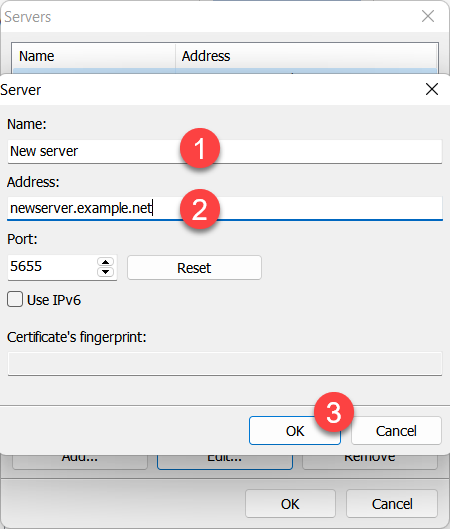
- Enter the new server name and address and click OK:
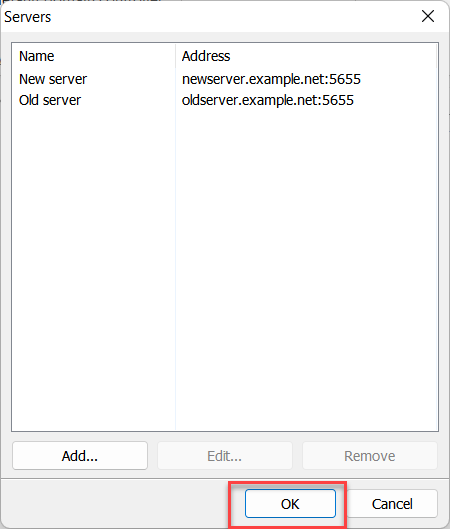
- Your new server will appear on the list. Click OK to close the Server Manager:
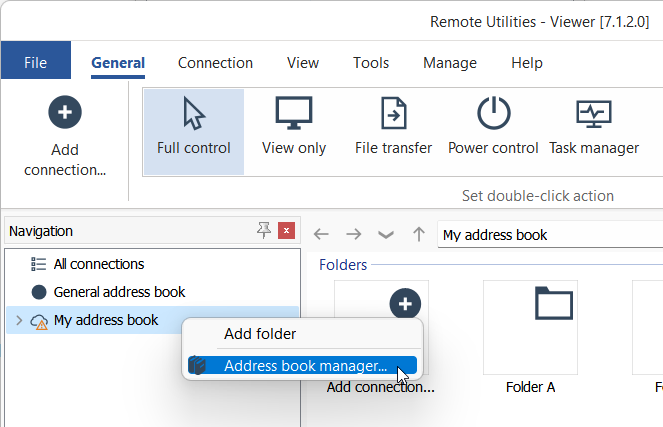
- Right-click on your synced address book and choose Address book manager:
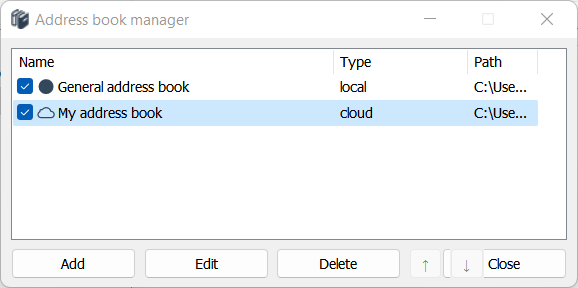
- Select your synced address book in the list and click Edit:
- Go to Online synchronisation, select your new server from the drop down list and click OK:

- Sign in on the new server using the same access credentials you used before the migration.
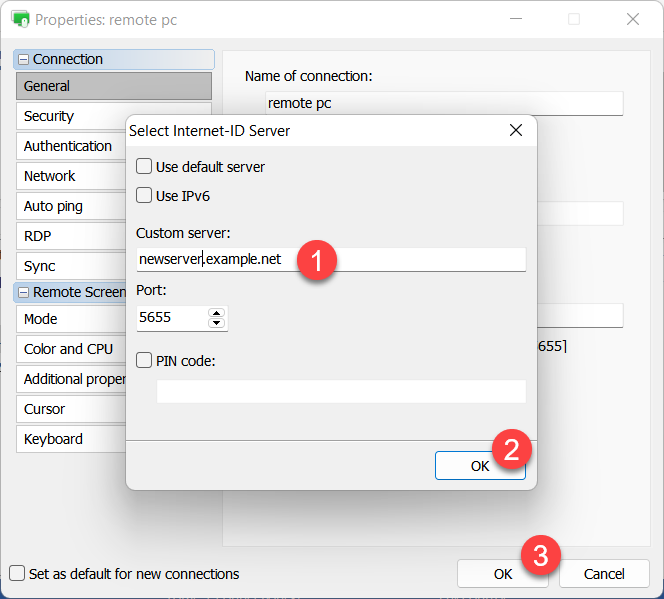
Update server address in connection properties
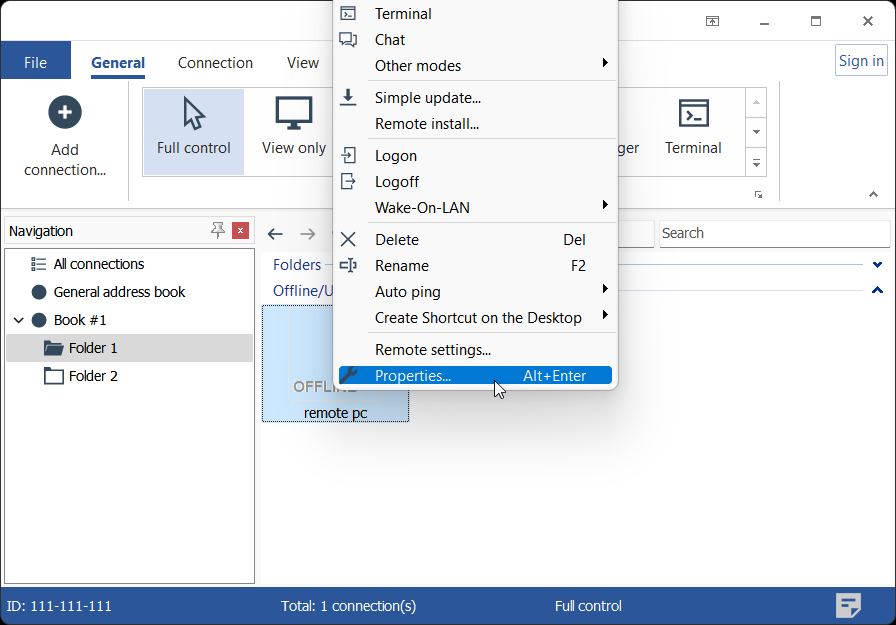
- Right-click on a connection in your address book for which you want to update the server address and choose Properties.
- In the General tab click the Change button.
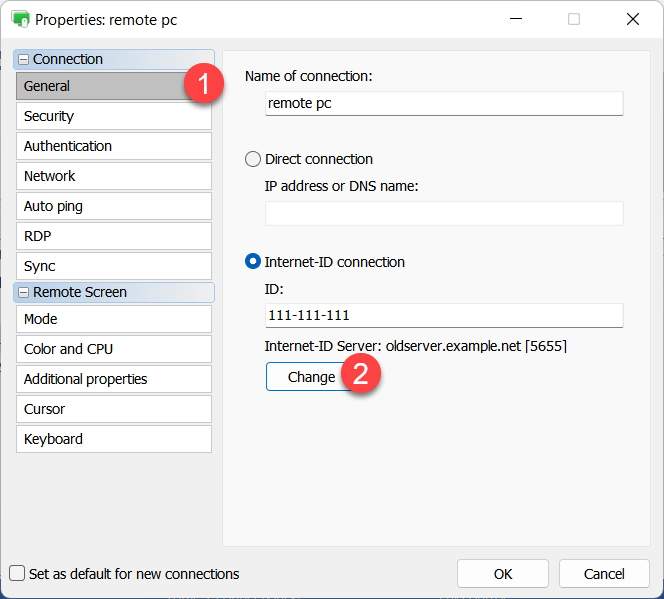
- Update your server address, click OK and close connection properties.
Update server address on Hosts
Important
Only do this step if the IP address or DNS name of your server has changed after migration.
You can update the server address on Hosts in different ways:
- Manually on each Host machine. Right-click on the Host icon in the system tray, select Internet-ID connection settings, click Advanced and choose Select Internet-ID server. Enter new server address in the dialog.
- Remotely from Viewer using Remote Settings.
- By building a new Host installer in the MSI configurator and updating your Host installations using a distribution method available to you (e.g. push-install using GPO, manually, etc.).
If you use RU Server for authenticating on the Hosts, you must update the server address in Settings for Host→Authentication→Custom server security→Servers.