Viewer for Mac and Linux Beta has been released
We are happy to announce our first ever Remote Utilities Viewer for Mac and Linux. This is a native client for these operating systems. The program doesn't require installing any additional frameworks.
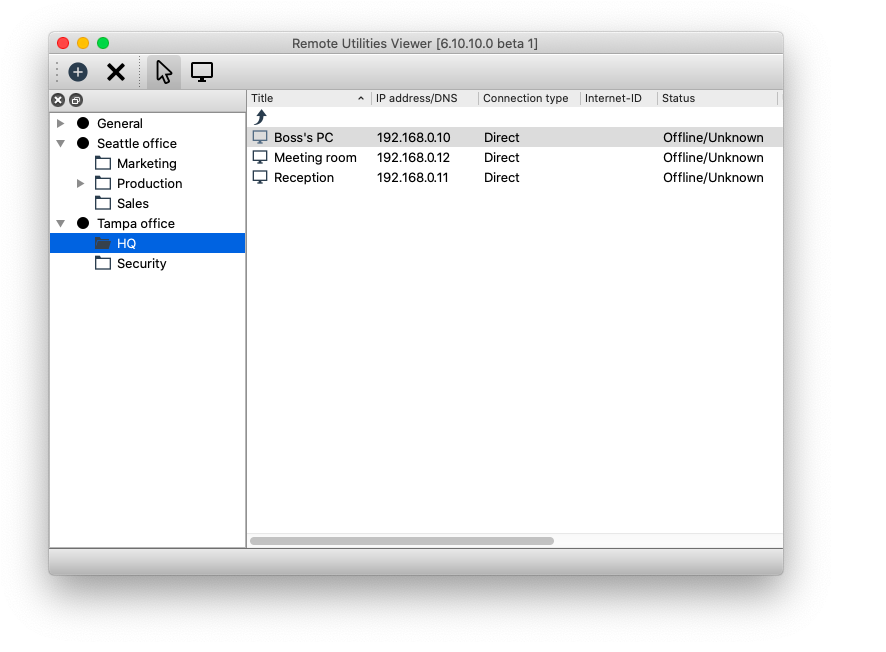
Viewer for Mac/Linux is available for beta testing (download for Mac or Linux) at no cost. Beta 1 has a limited feature set — more features are going to be added in subsequent beta releases (Beta 2, Beta 3 etc.) and the final release.
This blog post is an overview of Beta 1 with information on how to get started with the program. We will use Viewer for Mac as an example — everything written below also applies to Viewer for Linux.
Importing address books
If you have been using Remote Utilities for Windows for a while you might want to import your existing address book into Viewer for Mac. Make sure that you first export your address book into an XML file in Viewer for Windows.
Here is how to import your address book into Viewer for Mac:
- In the menu select Manage -> Address book manager:

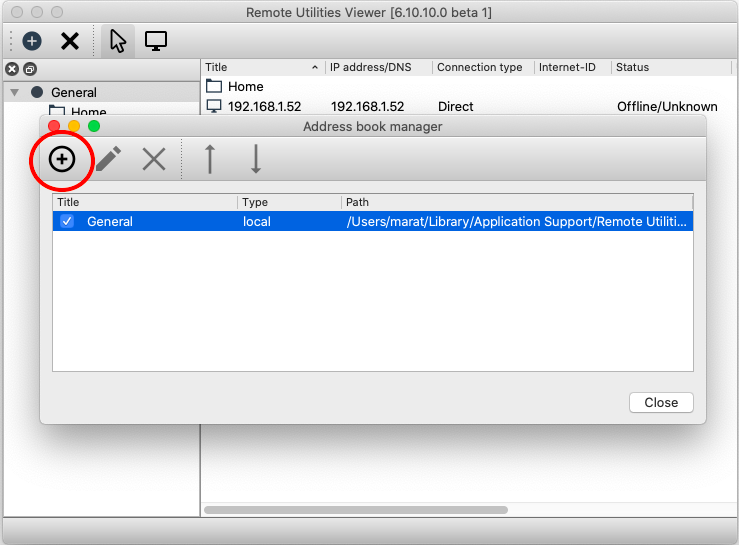
- Select the "plus" icon in the address book manager toolbar:
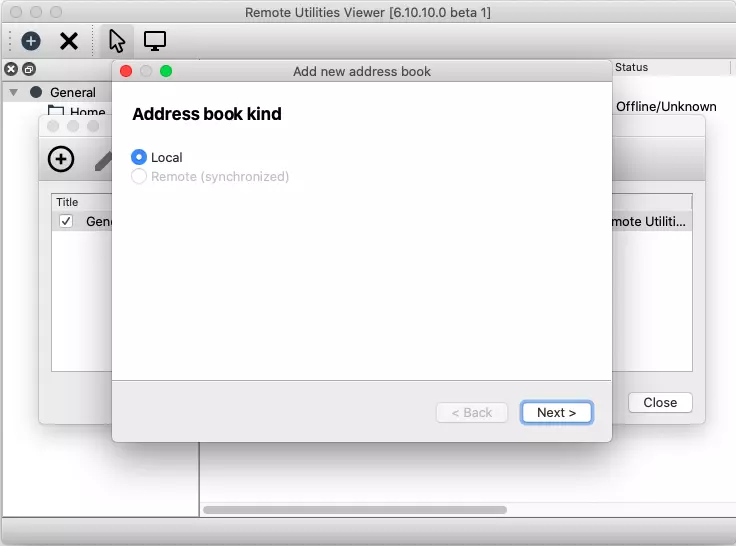
- Select Local and click Next:
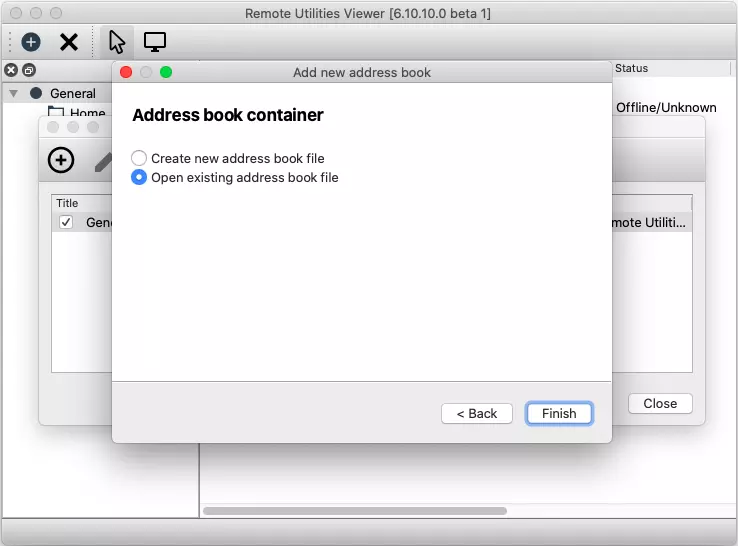
- Select Open existing address book file and click Next:
- Find the address book XML file on the disc and click Open. Your address book will get added to Viewer for Mac.
Please, note that if you used to save connection passwords in your address book and you want to import the address book with passwords the process is a bit different. For instructions please refer to the Q&A section in this community post.
Adding connections and folders
To add a new connection use the "plus" icon on the Viewer toolbar. Alternatively, you can right-click in the address book and select Add new connection.
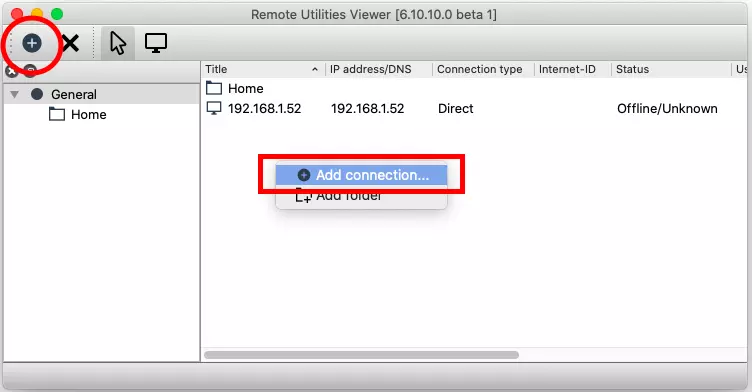
To add a new folder right-click in the address book and select Add folder.
Connection modes
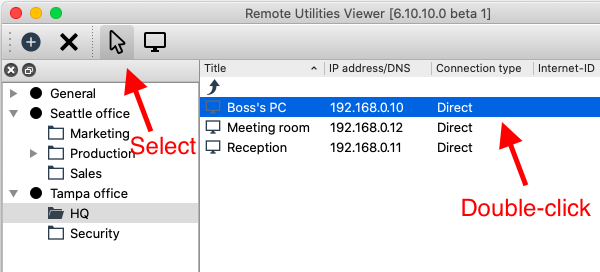
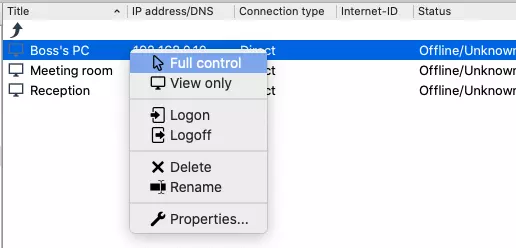
Beta 1 only has two connection modes — Full Control mode and View Only mode. Just like in Viewer for Windows you can run either mode in three different ways:
- Select the desired mode icon on the toolbar and double-click the target connection in the address book:
- Right-click on the target connection in the address book and select the desired connection mode from the context menu:
- Switch between two modes on-the-fly using the arrow icon on the Full Control and View mode toolbar.
Properties
To bring up individual properties for a specific remote connection right-click on it and select Properties:
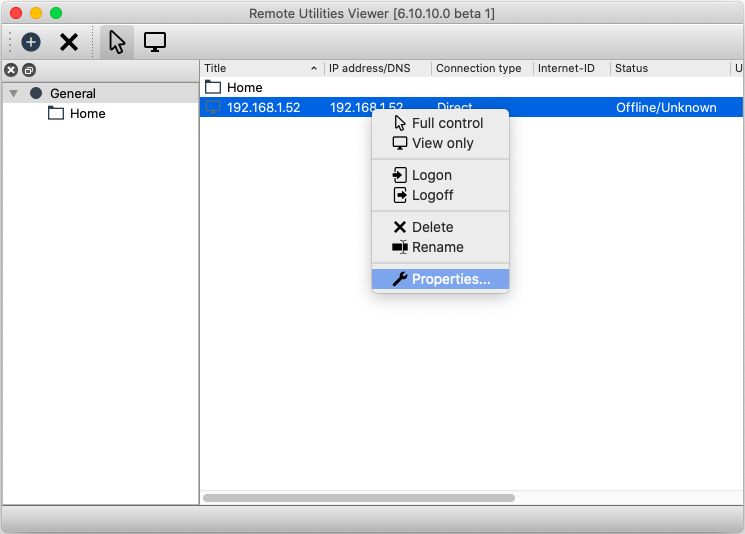
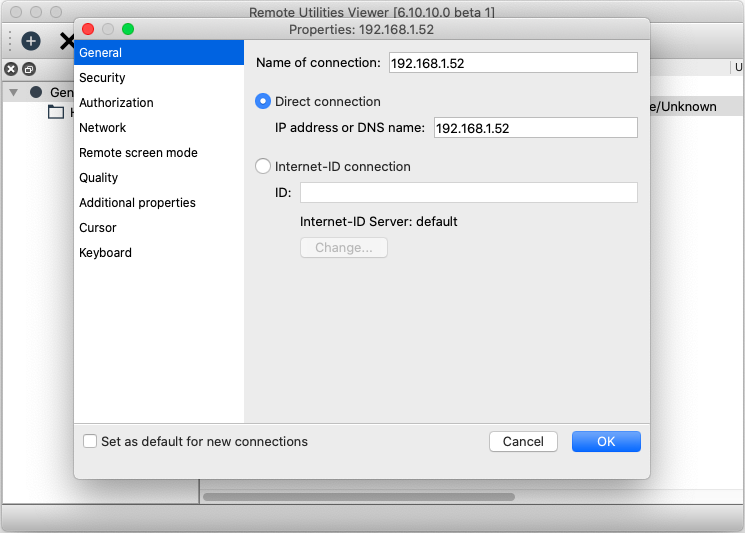
You may find that some properties are not working despite their corresponding checkboxes are available in the interface. Don't worry. Support for these will be added in subsequent beta versions and in the final release.
We would like to invite everyone to participate in open beta testing of the Viewer for Mac/Linux and leave your comments, bug reports and suggestions in this dedicated forum discussion.
Thank you!