7 Essential Tips for Using Remote Utilities More Efficiently + 3 Bonus Insights
Navigating Remote Utilities can be a game-changer for anyone looking to simplify their remote work or support. We've gathered some top tips to help you get the most out of this powerful tool, making your remote sessions a breeze. Whether you're a seasoned pro or just starting, these insights are bound to make your remote access experience even better.
Tip 1: Save Access Password
One of the simplest yet most effective ways to streamline your Remote Utilities experience is by saving your access passwords within the software. This saves you the hassle of entering your credentials each time.

Here's how you can set it up:
- Open the Connection Properties: In your Remote Utilities Viewer, right-click on the connection you want to modify and select
Properties. - Navigate to the Security Tab: Here, you'll find the option to save your password. Ensure you're using a strong, unique password for each connection to maintain security.
- Save and Connect: With your password saved, connecting to your remote machines becomes a one-click affair, freeing up your time for more important tasks.
This small adjustment can significantly enhance your efficiency, especially if you manage multiple connections. Remember, security is key, so always use strong passwords and consider changing them regularly.
Tip 2: Use Default Connection Properties
Setting up default connection properties in Remote Utilities can be a real time-saver, especially when you're managing multiple remote machines. By configuring your preferred settings once, you can apply them to all future connections, ensuring consistency and efficiency across your remote sessions.

Here's how to make the most of this feature:
- Access Default Connection Properties: From the main menu in the Remote Utilities Viewer, go to
Toolsand selectDefault connection properties. - Customize Your Settings: Adjust settings such as the authentication method, color depth, screen view mode etc. to match your needs. These settings will become the default for any new connections you add.
- Apply and Save: Once you've fine-tuned your settings, click
OKto save them. Any new remote machine you add to your address book will inherit these properties, making setup a breeze.
This approach not only streamlines the setup process for new connections but also ensures a consistent user experience across all your remote sessions, allowing you to focus on the task at hand without the need for constant adjustments.
Tip 3: Restart Agent as Administrator
Sometimes, remote tasks require administrative rights, especially for installations or system modifications. Remote Utilities offers a seamless solution with the "Restart Agent as" feature, allowing you to restart the remote session with elevated privileges.
Here's how to utilize this feature effectively:
- Initiate a Session: Start your remote session as usual through the Full Control mode.
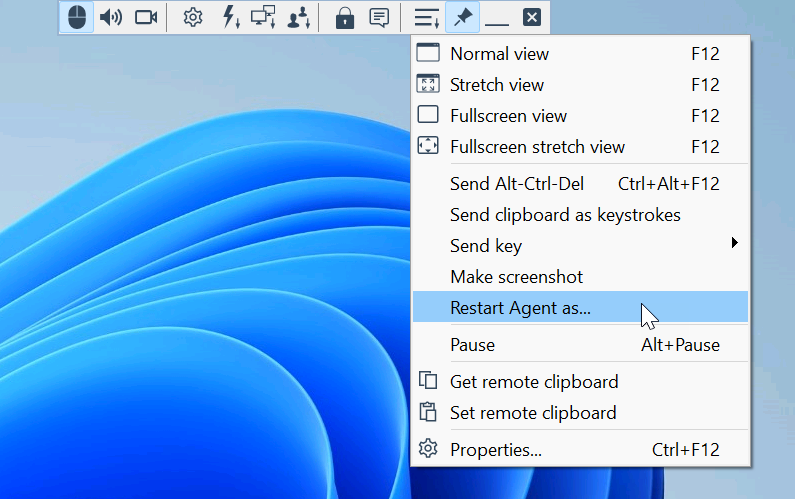
- Restart with Elevated Rights: In the remote session window, find the
Actionsmenu, and selectRestart Agent as. - Provide Credentials: If prompted, enter the administrator credentials for the remote machine. This step ensures that elevated actions are securely authenticated.
This feature is particularly useful for IT professionals and system administrators who frequently need to perform tasks that require higher access levels. By leveraging "Restart Agent as," you can ensure that necessary tasks are completed efficiently without compromising security.
Tip 4: Enable 'Ask User Permission'
To bolster security and foster trust in remote sessions, it's essential to ensure transparency with end users. Remote Utilities addresses this with the Ask User Permission feature, requiring the remote user's consent before establishing a connection. This practice not only enhances security but also promotes a respectful and transparent remote support environment.

Here's the correct way to enable this feature:
- Access Host Settings on the Remote Machine: On the remote computer where Remote Utilities Host is installed, open the Host settings.
- Enable 'Ask User Permission': Navigate to the
Confirmationtab. Here, check theAsk user permissionoption to activate this feature. - Configure the Permission Request: You can customize the permission request by setting a timeout or having the Host asking for permission only if a Windows user is logged on.
By activating "Ask User Permission" on the Host side, you ensure that every remote session begins with clear communication and consent, reinforcing the integrity of your remote support practices.
Tip 5: Connect Through Host
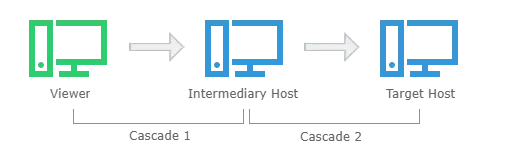
In cases where direct connections are impeded by network limitations or stringent security measures, the Connect Through Host feature (cascade connection) shines by using a Host as a relay for connecting to remote machines. This is especially useful in complex network setups or when enhancing connection security.
Here’s how to leverage this feature:
- Set Up the Host as a Relay: Ensure the Host module is operational on the computer intended as a relay, with reliable internet or network accessibility.
- Adjust Connection Properties: Within the Remote Utilities Viewer, right-click the intended connection and select
Properties. - Activate 'Connect Through Host': In the
Networktab, enable theConnect Through Hostfeature by entering the Host's IP address or DNS name.
In instances where both direct and Host-through connections are unfeasible, Remote Utilities Internet-ID connection provides a seamless alternative, bypassing NAT/firewall constraints without the need for intricate configuration. This ensures you can maintain remote access under various circumstances, offering flexibility and ease of use.
Tip 6: Use Multiple Authentication Methods
Diversifying your authentication methods adds an extra layer of security to your Remote Utilities connections. With options ranging from single password to Windows authentication, you can tailor access requirements to meet your security needs.
Here's how to leverage this feature:
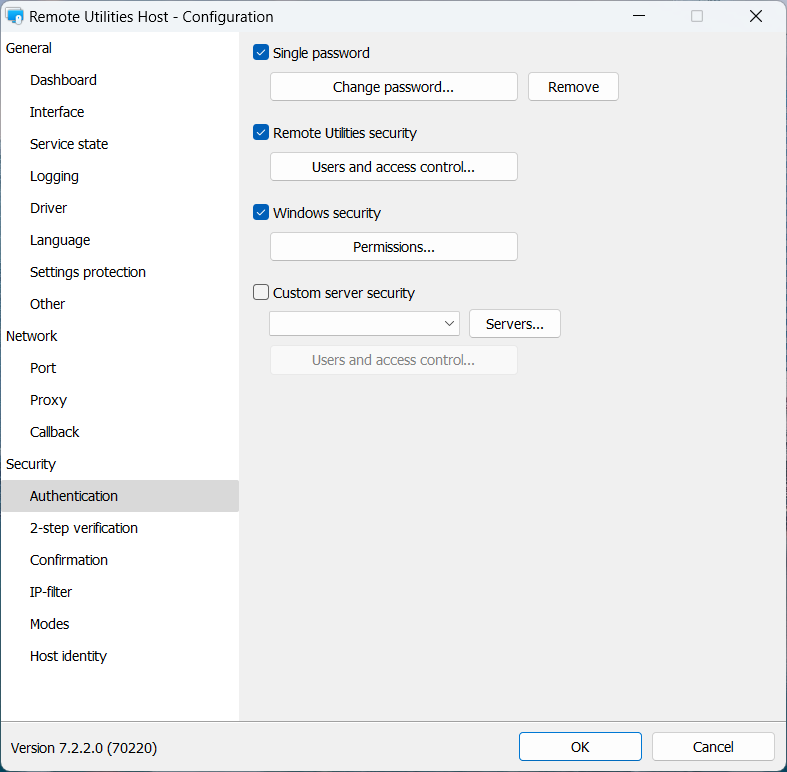
- Explore Authentication Options: Within Remote Utilities, explore the various authentication methods available, such as single-password, login-and-password (also known as 'Remote Utilities security'), Windows authentication and RU Server security.
- Configure for Each Connection: For each remote connection, consider which authentication method provides the right balance of convenience and security for your needs. Note that for each Host you can enable several authentication methods and switch between them.
- Apply and Educate Users: Once set, ensure that all users understand the authentication process, enhancing security without compromising usability.
By employing different authentication methods, you significantly reduce the risk of unauthorized access, ensuring that your remote sessions remain secure and trusted.
Tip 7: Detach Tabs If Needed
When working with multiple remote sessions in Remote Utilities, detaching tabs can greatly enhance your multitasking capabilities. This feature allows you to view and manage multiple remote desktops in separate windows, facilitating easier navigation and comparison.
Here’s how to use it:
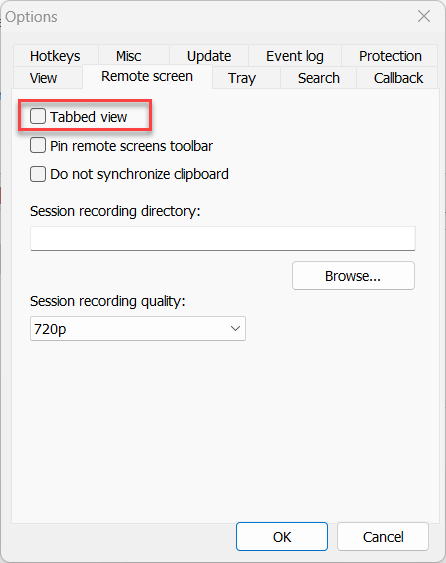
- Open Viewer Options: In the Remote Utilities Viewer, go to the
Toolsmenu and selectOptions. - Disable 'Tabbed view': In the
Remote Screentab, uncheck theTabbed viewoption. This will allow each remote session to open in its own window instead of as a tabbed view. - Organize Your Workspaces: With each remote desktop in its own window, you can arrange them on your screen(s) as needed, improving your workflow and efficiency.
Detaching tabs is particularly useful for IT professionals who need to monitor or interact with multiple machines simultaneously, providing a clear and organized view of each remote session.
Bonus Tip 1: Optimizing Performance for Different Network Conditions
Remote work environments can greatly vary, and so do the network conditions. Remote Utilities allows you to tailor your remote session settings to optimize performance, ensuring smooth operation regardless of whether you're working over a high-speed LAN or a slower internet connection.
Here’s how to adjust for optimal performance:
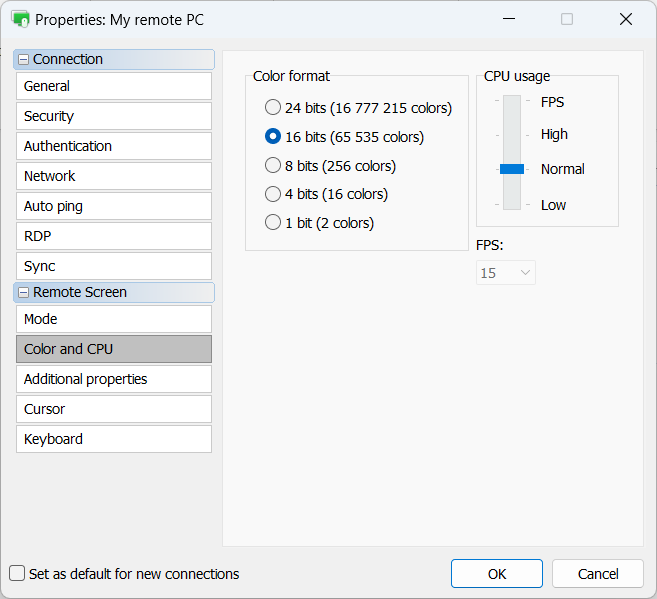
- Adjust Color Depth: In the connection properties on the
Color and CPUtab, you can lower the color depth to reduce the amount of data transmitted, which can significantly improve performance over slower connections. - Manage CPU Usage: Remote Utilities provides options to control the CPU usage on the remote machine, which can be particularly useful for ensuring that remote sessions do not overly impact the performance of the remote computer.
By fine-tuning these settings, you can achieve a balance between visual quality and performance, ensuring efficient remote access under various network conditions.
Bonus Tip 2: Using the MSI Configurator for Mass Deployment
Deploying Remote Utilities across multiple devices in an organization can seem daunting, but the MSI Configurator simplifies this process. It allows you to create a customized Host or Agent installer with pre-defined settings, perfect for large-scale deployments.
Here's a quick guide:
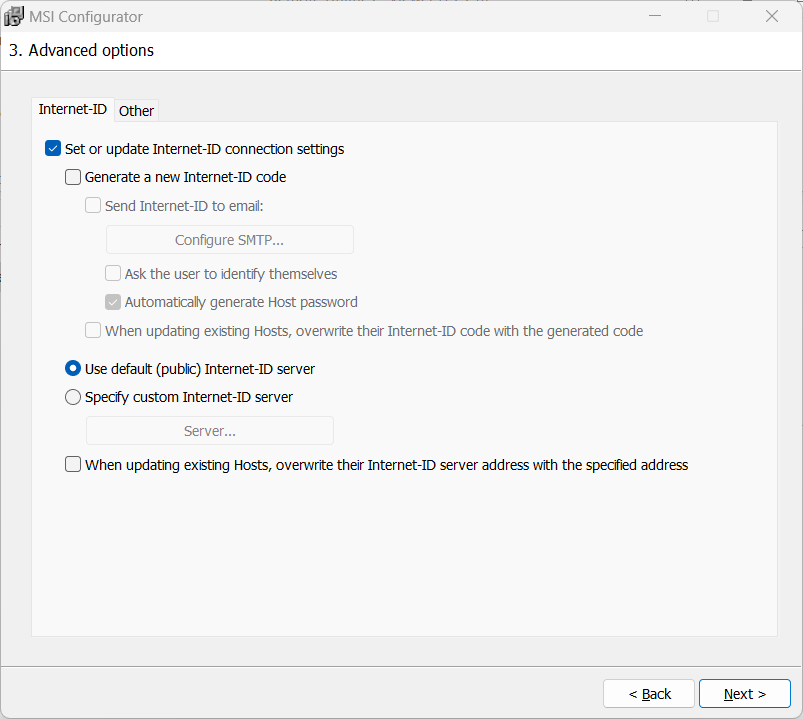
- Launch the MSI Configurator: Access this tool from the Remote Utilities program folder to start customizing your installation package.
- Customize Your Installer: Choose the desired Remote Utilities components and configuration settings, including licensing information, default access passwords, and Internet-ID settings.
- Deploy Across Your Network: Once your customized installer is ready, you can deploy it across your organization using group policy objects (GPOs) or other software deployment tools, streamlining the setup process and ensuring uniformity across all installations.
Bonus Tip 3: Use Column View
When managing a large number of remote machines, organization is key. Remote Utilities Viewer offers a column view, which organizes your remote connections into columns, making it easier to navigate and manage multiple connections simultaneously.
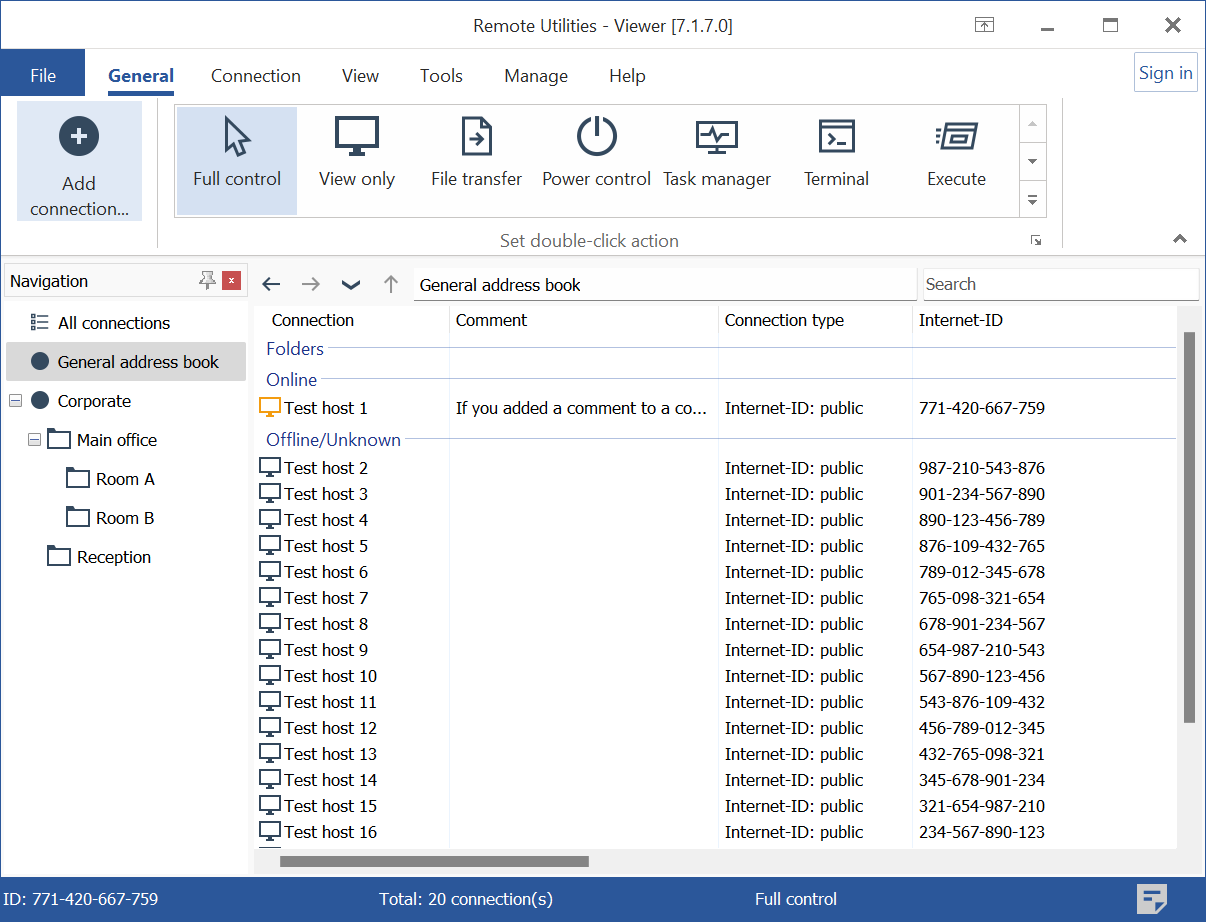
To enable columns in the Remote Utilities Viewer, go to the Tools menu and click the Details button. This organizational feature is invaluable for IT professionals and administrators who need quick, clear access to a vast array of remote machines, enhancing efficiency and response times.
Conclusion
By implementing the tips shared in this blog post, you can unlock even greater efficiency, security, and convenience in your remote sessions. Whether it's optimizing connection settings for various network conditions, deploying Remote Utilities across an organization with ease, or organizing your remote connections more effectively, each tip is designed to enhance your Remote Utilities experience.
Thank you for following along, and we wish you success in your remote access endeavors with Remote Utilities!
Last updated: